How Can I Do Nail Art At Home?
There are several different types of nail art you can create at home, and the options are endless. Some are easy to make and look professional, such as swirls, while others require work. In any case, you can find an easy DIY nail art project that will impress your friends. In addition, you can avoid allergic reactions from nail products if you follow these tips. Continue reading for ideas. We’ll also cover how to apply simple nail stickers to look professional.
Simple nail stickers look professional.
Whether you want a clean and polished look or a high-end salon-style manicure, simple nail stickers can make you look like a pro! They come in various forms and can be used on their own or with nail polish to give you the look of a manicured nail salon. There are even nail stickers that glow in the dark! You can create a professional-looking manicure at home in no time!
To apply nail stickers, you need to start by cleaning your natural nails and then using your stickers. The stickers may not adhere to wet polish, so you should ensure that your gel or shellac is fully cured before applying them. You can use tweezers to peel the sticker off the backing sheet. The adhesive side of the sticker can be reduced if you touch it with your finger or tweezers, so you’ll need to use the correct tools to apply them.
Once you’ve applied your nail stickers, you can follow up with a top coat to protect them and give them a long-lasting, professional-looking finish. You can also remove them as they lift off. There are three ways to do this:
Nail stickers are great if you don’t have much time to devote to a manicure. If you’d rather spend a few minutes at home, nail decals are the perfect solution. They’re a great alternative to going to a salon and having a manicure without a trip to the salon! You can even add fun patterns and designs to your nails with a few simple stickers.
Nail stickers are a quick way to add a little pizzazz to regular polish. They can be applied to your nails right after your nail polish has been used and then sealed with a clear topcoat to prevent them from snagging. They’re also easy to remove, so you don’t have to spend a lot of time getting a professional manicure! There are many different options for nail art stickers, so you can find the perfect one for you!
If you’d like to have a more elaborate manicure, consider investing in nail decals. They come in a variety of designs and colors. Choose a light-colored base so that the decals will stand out against your skin tone. When you’ve chosen your favorite designs, remove the backing of the stickers and apply them to your nails. These decals will last for a whole week.
A good set of nail stickers comes with 16 overlay and tip strips. With these, you can customize your look and get the perfect finish. The adhesive and the quality of the stickers are excellent – they hold up well to washing, shoveling gravel, and cleaning the house. Even the sticky residue on the window could not destroy them. These stickers look great, and they’re also a great way to learn new colors and creativity!
Easy DIY nail art
There are many ways to create simple DIY nail art designs. If you are looking for a quick and easy way to get a unique look, you can use a simple gold nail polish. This nail design is straightforward to create, but it can be tricky to clean. Use a clear coat to seal your plan, and you’re good to go! Just follow the instructions below to learn how to create your own stunning DIY nail designs.
First, prepare your tools. A set of paintbrushes can be used to create stripes. For this easy DIY nail art, you can buy a fan-shaped paintbrush and pry off the meeting base. You will then dip the fan-shaped paintbrush into the pink nail polish and apply the stripes in a horizontal line across the nail. Lastly, use a top coat to protect your nail art design. You can use your favorite color to add accents to your nails!
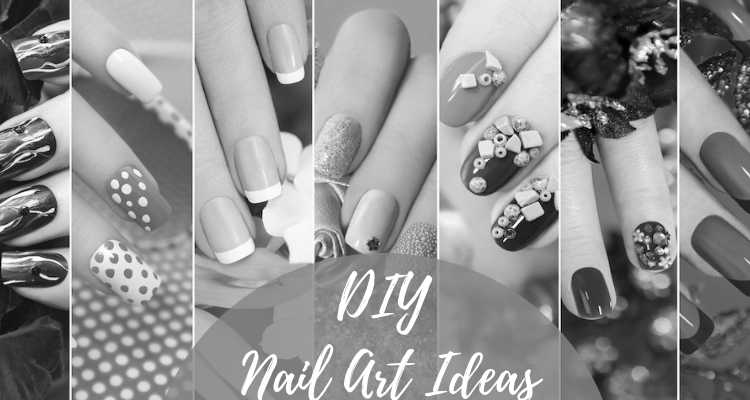
If you’d like to create more intricate designs, you can use simple shapes and colors. You can try using neon dots or striping tape to create incredible designs. Or, go for a clean, minimalist design, like this one by Lulus. Either way, you’ll have a great-looking manicure. If you want to get creative, try something new! This summer, make your nails stand out with some fun nail art! Try a new design every week! You’ll be amazed by how much fun it can be!
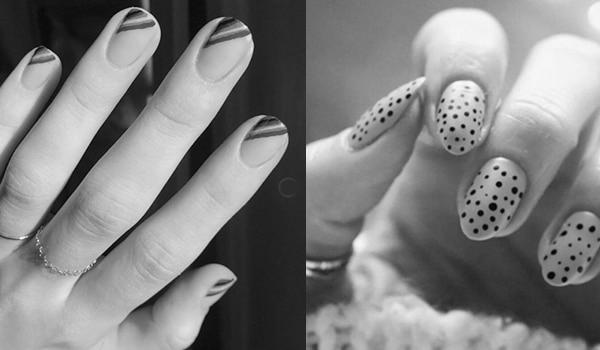
Another easy DIY nail art at home design involves polka dots. You can use a pencil or a bobby pin to create bubbles. Alternatively, you can use a sponge to create ombre nails. If you prefer a more abstract design, try using plastic wrap or a toothpick. And whatever you do, make sure you choose the suitable nail polish to add a pop of color. This is one of the most accessible and fun DIY nail art ideas.
Start by placing a gold stud near the cuticle of the index and pinky fingernails. You can also do this on your middle and thumb fingers. Then, use a dotting tool to create 5 dots in a circle. If you use a dotting tool with an end, you can use this as the end of the device. Lastly, add a gold stud to the center of the daisies to complete the look.
Avoiding allergic reactions to nail products
While it is not possible to avoid allergic reactions to nail products, there are several tips you can follow to reduce your risk. First, prevent nail products that contain common allergens. The most common allergens in nail products are UV gels, liquid monomers, wraps, and tip adhesives. These ingredients cause allergies because they irritate the skin. Skin allergies result from repeated skin contact for months or even years.
The development of skin allergies occurs through a process called sensitization. Exposure to a specific substance causes the skin to become hypersensitive to it. This process is usually triggered by a breach in the skin’s natural barrier. Once inside, the essence combines with proteins in the skin. This triggers the production of white blood cells, which are part of your immune system. The released chemicals cause various symptoms, including burning, blistering, and itching.
To avoid allergic reactions to nail products, you should always wear nitrile gloves and ensure that your nail tech wears nitrile gloves. Avoiding skin contact and flooding the cuticle area are also two ways to minimize your risk. You can also prevent nail polishes from containing the ingredient that causes an allergic reaction. By following these tips, you can reduce your risk of developing an allergic reaction to nail products.
The most common allergic reaction to nail products comes from fragrance ingredients. While they are common allergens, most cosmetics are also allergenic to fragrances. Fragrances and preservatives are the two most common causes of skin allergies. However, many other ingredients can cause simple irritations and develop into skin allergies if repeatedly exposed. To avoid these reactions, nail professionals should follow the correct safety precautions to minimize their exposure to nail products.
In addition to avoiding formaldehyde, another common cause of allergic reactions to nail products is toluene. While many nail products are allergen-free, some still contain toxic ingredients. Di-HEMA and Bis-HEMA are less allergenic than HEMA. When combined with HEMA, these two ingredients lower the risk of allergic reactions. However, when choosing nail polishes, read the label carefully.
If you’re afraid you might have an allergic reaction to nail products, it’s essential to make sure your nail tech knows about the allergen. Methacrylate chemicals are common in gel polish and acrylic nails. However, the risk is still too high. If you have an allergy to methacrylates, you should always avoid them. They can cause a severe rash and can cause permanent damage to your skin.
Nail Art Ideas For Small Fingernails
If you have a small fingernail, nail art ideas for tiny fingers can be pretty creative. Here are some examples of simple, colorful, and pattern designs. You can also choose a Disney-inspired design to make your nails look more like princesses. Read on to find out more. Listed below are some of the more popular methods for tiny fingernails. Hopefully, these ideas will get you started!
Simple designs
If you have small nails, you should know that there are several designs for small pins that you can try. These designs are simple, and you can apply them to your long and short nails. You can also opt for a monochromatic design which can work for any occasion. Its basic features include a white base coat, curved lines, and filling in space. Here are some tips that will help you choose suitable designs for small nails.
Blue is an iconic color and looks super chic. Wear a blue eye on your nails to protect yourself from evil forces. Its soft and modern look will surely make heads turn. Bananas are a popular fruit and look great on nails. If you’re into football, you can paint them in florescent yellow or green and pair them with black or white. This simple design will surely get you noticed by your friends.
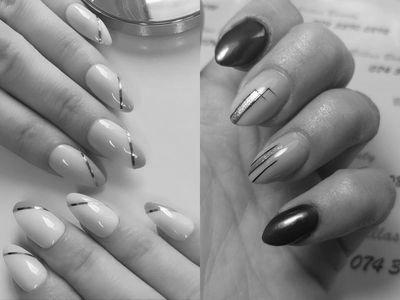
You can also try geometric designs on your nails by using striping tape. You can place a strip of nail polish in the center of your finger. After painting, you can use two shades of the same prime color on each side of the strip. Use a top coat to seal the design. Geode stones can also be created by using a white base and two different shades of blue. You can choose between simple and complex nail designs depending on your preferences.
If you are a fan of red and pink, you can opt for a design that has red and pink colors together. This combination represents love and romance and is appropriate year-round. Alternatively, you can go for a plan that incorporates your favorite music genre. Whether you’re a music lover or a fashion enthusiast, it will look great. These are just a few of the many simple designs for small nails.
Colorful designs
Black and gold manicures are timeless and look chic and glamorous. Here are some examples of color schemes you can try. Colorful designs for small nails may also include hearts and stars. If you’re unsure what method to go for, you can always try one of these simple nail designs.
This nail design is an excellent choice for those who want to express their personalities with their nails. This design has geometrical designs and colors that complement each other. This design is also fun to get your nails ready for a night out. If you’re an avid football fan, you’ll love this design. It’s created using shades of pink and red and looks like an illustration of Blossom from Powerpuff Girls!
The classic freehand design is an excellent choice for spring and summer. Its white base makes it easy to create and requires minimal precision. You can also opt for tribal patterns or basic geometrical patterns. These patterns look stunning against white nails, perfect for spring and summer. If you’re not feeling adventurous, you can combine patterns with neutral backgrounds to create a gorgeous nail design that stands out from the rest of the crowd.
Stripes are a popular design because it’s easy to create. They give your nails a more unique look than any other. Whether you’re going for simple or complex, there’s no wrong choice! Just remember to wear nail art with confidence. Enjoy yourself, and your nails will show off your personality! So get out there and show off your creativity! And remember that there’s nothing wrong with trying something new and exciting!
Patterned designs
If you’re looking for designs for your tiny nails, you can go for simple ones with a pastel color like baby blue. The design on your nails is straightforward but looks elegant. You can experiment with different colors and patterns to make them unique and special. Try out other ideas, and see which one suits your style the most! If you are not sure which design to choose, try this one! It looks great and is very easy to do.
Try a striped design if you’d like to add a playful element to your nails! Stripes can be made in different shades of pink or red. A light pink base coat is needed. Then, you can paint your nails white or black. This design is perfect for summer. You’ll look gorgeous in this nail art! Make it even better with the help of nail polish! One of the most popular patterns for small nails is a striped design! This design features a strip of white on top of a dark pink background.
Alternatively, you can go with a yin-yang design. It’s an intriguing pattern that incorporates yin and yang symbols. They’re an easy way to add a touch of whimsy to your nails. Just make sure you have an extra bottle of nail polish on hand. You can add other patterns and motifs to your nails, too! So, what are you waiting for? Try one out today!
A monochrome design is a good option for small nails, too. This design is made from black and white nail paint and would look fabulous on any occasion. When choosing a color, choose the essential shade to begin. Once you’ve completed your base coat, you can start filling the space between the lines and patterns. A good design should last for a few weeks, and you’ll be able to wear it again!
Disney-inspired designs
Whether your nails are long or short, Disney-inspired designs are most popular today. You can choose from Mickey Mouse, Dumbo, Stitch, Baby Yoda, Winnie the Pooch, and many other characters from the Disney universe. There are many ways to make your design pop, but a classic is the combination of polka dots and mickey mouse ears. This design never goes out of style, so it’s guaranteed to stand out no matter where you go.
For an extra-special look, try a Disney-inspired design on your small nails. Disney-inspired designs are recognizable from a distance, so you’ll feel like you’ve been transported back to childhood. A Mickey-shaped balloon, a pineapple, or a Disney princess can make a great accent nail on a thumb or index finger. Try using a Disney character as an accent nail for a fun, unique look, such as Mickey Mouse or Princess Elsa.
To make your nail design pop, choose a theme with Disney characters that bring back a happy memory of the 90s. For example, if you’re attending a fancy party, you can wear a Disney-inspired design on your nails. This design is suitable for any occasion, from formal events to casual dinners with your loved one. Consider a Disney-themed nail design if you’re not looking to go all out.
Another fun theme to try is a Disney ear design. Minnie Mouse is one of Disney’s most iconic characters, and the acute, polka-dotted design on your finger is an easy DIY project. Try painting Mickey or Minnie Mouse’s faces on your nails if you’re more adventurous. Whether you want to be a princess or just want to show off your nail art, these designs will make you look cute and youthful. Remember not to overdo it, as it can lead to unwanted results.
Nature-related designs
If you love the natural world and love to adorn your fingernails with pretty and whimsical nail designs, consider using nature-related themes for your tiny nails. Choose a favorite flower or plant, or use cute little birds and butterflies to add a playful touch. Nail art can be bold, muted, or simply as a neutral base coat. If you’re unsure what to choose, consider clashing colors for a brighter look.
Try pastel colors, such as baby blue. These colors are in fashion this year. Another great choice is a single nail. Single-nail designs are easy to create and can be improved upon over time. To add a bit of glimmer, use silver nail paint. These designs look stunning and are incredibly versatile. There’s no right or wrong way to create them, so try several different looks and see which one you like best!
