Easy Nail Art Designs to Do at Home

There are countless ways to add unique nail art to your fingernails. Whether you want a simple design or a more detailed look, you have a simple nail design. You don’t need any special tools for this. A regular paintbrush can be pried at the base to make a fan brush. To create the stripes, use turquoise nail polish as the base, then dip a fan brush in pink paint and run it in a horizontal line across the nail.
Simple designs

Try a few simple nail art designs at home if you love flowers. You can create beautiful floral arrangements with two or three coats of nail polish. Or try something more unique by using two different shades of the same shade. Let your nails dry completely between coats, and don’t skip the base coat! Try these fun and easy nail designs, and you’ll soon be able to look like a professional!
Another easy design is polka dots. You can paint them with a toothpick or dotting tool. You can also try an abstract look by putting different colored dots together in various formations. Cherry nail art is another popular option. Simply paint cherry shapes on a background with white and let them dry before adding other colors. You can then use nail polish remover to remove the old polish and apply a clear coat to seal the look.
Another easy design that requires little to no tools is stripes. Stripes are done by dipping a fan brush into pink paint and running it horizontally across the nail. If you don’t have a fan brush, you can cut a regular paintbrush into a ‘V’ shape and use that as your base color. You can also try a simple white design for a subtler look.
Swirls

Swirls are simple nail art designs that anyone can try at home. You can create the design with nail paints or a toothpick. You can also use a glass bowl, which you can reuse. The plan will spread more evenly if you gently swirl it in water. Alternatively, you can dip your finger in nail polish remover. Then, you can add dots and embellishments to the swirl nail paint.
Swirls are one of the most popular nail art designs. They combine various colors and can be made to look really fancy. You don’t need to make all your nails swirly, just some of them. And you can even make some nails plain so they won’t look like a swirl. The key is to be creative with your design. The possibilities are endless. You can create a beautiful design with wheels on just one nail.
Swirls are another easy design to do at home. These nail designs can be achieved by using different shades of green and tape:
- Apply a white base color.
- Arrange the recordings in a geometric pattern. Once you’ve finished, paint the second side with green polish.
- Apply a top coat to complete the look.
Remember to use different shades of green to add an extra pop of color to your design.
Polka dots

To create this nail art design, you need a few essential tools. You can use a toothpick or a rounded bobby pin. Then, dab a small amount of polish onto a piece of paper. Next, poke the toothpick into the polish, coating the nail base with polka dots. Afterward, you should apply a top coat to protect your nails.
If you’re looking for a classic design, you’ll want to use large polka dots. They will look best on a square-shaped nail, while round or oval-shaped nails will look better with smaller beads. To make your nail design look even more fashionable, combine different sizes of dots on other portions of the pin. Also, you can add accents of different colors.
You can also use a powerful dotting tool to paint the dots on your nails. It’s best to use an acetone wipe to remove excess nail polish before applying the dot design. You can also use a dotting tool to paint alternating colors on your nails. You can even use a pen! You can get creative with a polka dot manicure with these essential tools!
Ombre

If you have ever wondered how to create the look of ombre nails, you’re in luck. This stunning design can be done by anyone, even a novice. All you need is a few essential tools and a few minutes. You can create ombre nails with a sponge, acrylic or gel polish, a nail brush, or even a Q-tip. You can make any pattern or color combination you desire, and the result will be impressive.
First, start by painting your nails with a base coat. Add another layer of glitter to the top if you’re using glitter. This will bring the sparkles out of the glitter and make the green visible. After that, apply a clear coat over one nail on each hand. After a couple of days, the green polish will start to fade, leaving the sparkles on the tip of the nail.
To create ombre nails:
- Apply one color to each nail. If you’re going for a subtle effect, you can add rhinestones to the top of the nail.
- Paint the rest of your nails the same color.
- Wait a day or two before applying the second layer.
- Repeat this process several times until you’ve achieved the ombre look. If you’re not confident with your skills or have no patience, you can always check out YouTube tutorials to learn more.
Tribal manis

If you have never tried creating a tribal mani, it is a fun and easy nail art design to do at home. Tribal nails are a great combination of wild patterns and an any-color-goes palette. Using bright nail paint, you can create your very own tribal mani. If you like to experiment with colors, consider making a tribal rainbow mani. The combination of vibrant colors and stripes will surely draw women’s attention.
For tribal men, you need a black striper and several bright nail polishes. You can use a toothpick to pick a specific color and make a pattern with it. Once you’ve completed the design, apply a top coat to complete the look. You can also use a striper to create a pattern. You can apply the primary color as a base coat and then the striper to draw the way on the nail.
Another simple design is the ombre. This can be done with diluted formations or with special paints. This is an easy design to do at home. You need white nail polish and a toothbrush or dotting tool to create random lines. When you are done, stick the colors with unique materials. Afterward, add accent colors and make your design pop! You can wear this design to any occasion and still look fashionable.
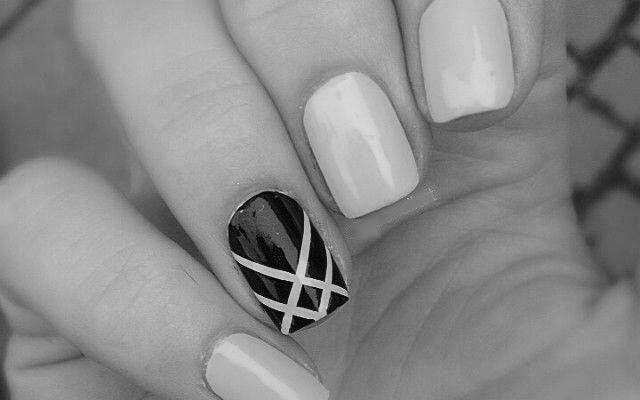
Stripes

Striped nails are an easy, fast, and fun way to dress up your nails. They look sleek and elegant, and they’re perfect for beginners. You don’t need stencils or wraps to make them – just a sharp brush, nail polish, and nail tape! The possibilities are endless! You’ll soon have a collection of unique, professional-looking fingernails to show off to your friends and family.
To create zebra stripes, you can use a thin striper brush. Start at the outermost part of your nail and apply most of the pressure. You’ll want the lines to be thicker than light, so don’t worry if they’re not perfect. You can always paint a second coat over the stripes to make them look even better! Don’t worry if you don’t like your lines to look too perfect – the process won’t take long.
You can also try a more complicated striped design by using a thin layer of silver glitter polish. This glitter polish will add a fun sparkle to the nail. Make small black stripes underneath each stripe to add more drama to the bars. In the end, lines are easy to do and look sophisticated. Then, use any other color you want, if you’d like!
Cloud nails

If you’ve wanted a fun nail art design that doesn’t involve special tools, cloud nails are a great choice. These simple designs don’t require any special tools and are durable enough to last up to 14 days using polish. You can also incorporate your favorite color into the design and integrate a cloud shape or form into your design. This design can be easily copied and is perfect for a playful work environment.
The base coat is the key to creating this cute design. You can also add dots around the edges to give the impression that the clouds continue off the nails. You’ll need a bright blue base coat and two coats of a darker shade of the same color to make these simple designs. Once your base coat is dry, apply a second coat of nail polish of a similar shade. Once you’re satisfied with the design, remove the mask and let the polish dry.
Start by painting your nails with white nail polish. After this, use a dotting tool or toothpick to make a semi-large dot on your nail. The first dot will form the first cloud, and the second one should be the same size and connected. Repeat the process until you have finished painting your nails. You can add more shadows to your pin by repeating these steps. The number of clouds depends on the length of your nail.
Easy Nail Designs For Short Nails

Glitters add an eye-catching element to an otherwise plain-looking manicure. Glitters, consisting of geometric shapes, is perfect for short nails because they add a playful element to the overall design. These glitters look particularly adorable over a white base. These cute pink polka dots are trendy and fun for short nails. If you want to make it extra attractive, consider adding a cherry embellishment!
Simple

If you’re looking for a quick nail design, you might want to try a black and gold manicure. The colors look super chic, and the combination of the two is incredibly glamorous. Despite the simple color scheme, these designs are striking and look stylish on even the shortest nails. Choose a plan with floral or jungle vibes, and you’ll love the way they look against a white base. Alternatively, you can try a cherry embellishment over a black and white floor.
These nail designs look great on short nails because they are simple yet elegant. You can choose a nail color that works with your skin tone and natural color. To create an accent nail, you can find matte nail polishes in royal purple and light mauve. To add even more interest to a short nail design, use a top coat to add a wet shine finish. If you’re a little more adventurous, try a leopard print manicure. The leopard print is a statement-making nail design and looks great!
Consider an abstract design if you’re not quite ready to go bold and paint every nail. The geometric shapes are more eye-catching when painted on a nude background. You can also try a bold design such as a flamingo. A bold design involving bright red and blue is comical, but it can turn heads if done well. Another good option for a simple nail design is a line-art effect.
Ombre

If you’re trying to decide between two contrasting nail styles, an ombre manicure may be the right choice. Its name explains its basic concept: blending two different colors into one. The design can be as subtle or as dramatic as you like. Because of its versatility, you can create different ombre nail designs for short nails, depending on your preferences. Here are some great examples. Read on to find out how to get your own unique look.
This ombre nail design will add a bit of class and elegance to your nails. Combine blue and lime green to create a deep style. Finish the look with clear glossy polish for a natural feel. It is a good option for women with dark skin tones. A simple way to add an extra flair to your nails is by incorporating some embellishments. Once you’ve chosen your favorite colors, experiment with different ombre nail designs for short nails!
If you want to match the ombre look, you can choose a contrasting color and use an almond shape. To add flair, use a lime green nail polish. For a DIY ombre manicure, you will need two or three nail polish colors and a sponge. Using the sponge, paint the nail with each color several times, allowing it to dry between applications. Use a base color, such as white, and a topcoat.
Stripes

Stripes are a fun, easy nail design perfect for spring and summer. Create stripes on your nails with a dotting tool or pen. Then, place five dots in a row, and the center one should be yellow. Use different colors for each stripe, and choose complementary colors. This is a great way to spice up a plain manicure! These are some easy nail designs for short nails.
If you want to create a bold design, try using bright pink and orange. You can experiment with different color combinations, but stripes are easy to assemble. You can make a vertical or horizontal stripe design and use different colors for the lines. You can also try a floral design on the middle two fingers. A floral design adds a touch of freshness to the design, and it’s also a cute look for summer!
You can also mix polka dots and stripes to create a stunning combination. Bars look best with gold and black nail colors. If you’d prefer a more subtle look, try using different colors in a gradient design. You can also try ombre net designs. While they’re easy to do, you’ll want to be patient and practice before you go ahead and try them out!
Animal print

Short nails can look great with an excellent animal print design. Adding a couple of animal elements to the invention can look even more remarkable. Animal print nail designs are great for any occasion and can be done quickly and easily. Just remember that the colors of the base and structure should coordinate with the color scheme of your outfit and makeup. It’s essential to consider the look of your entire ensemble when selecting animal print nail designs.
Whether you’re choosing a leopard nail design for your fingernails or a panda-themed manicure, you’ll find an easy-to-follow guide for doing it at home. These animal print nail designs are simple to apply at home and look great with a quick manicure. If you want to make a statement but still maintain a clean look, you can mix and match different animal prints to create your own design.
If you’re going for a sophisticated look, you can add some gold accents to your manicure. A subtle yellow or light brown will make your manicure look classier and elegant. Animal print designs on short nails can also be done with gold ornaments. They work well with other colors, but they’ll still look chic. A subtle yellow accent is a perfect accent to this look. Animal print nail designs are great for both short and long nails.
Floral

Flower nail designs are fun, funky, and fresh for your short nails. Flower-like designs with alternating colors are perfect for summer and spring days. The base color can be a rich red shade that goes well with brightly colored flowers. Flower petals are painted in shades of red, yellow, and orange with a black center, and the stems are blue. Adding a single red bloom adds a pop of color.
Short nails look fantastic with floral designs and can make a girl feel super glam. The dots can be fun to look at because people can distinguish what they mean. Some people think of ice cream, a flower, or even an abstract stoplight. Tortoiseshells are more time-consuming to apply but make a great manicure. Long nails are also fun, but short nails are not bad for a glam manicure.
Flower nail designs can be very feminine or bold, depending on your taste and occupation. The possibilities for flower nail designs are endless! These designs can be subtle or aggressive, and you can choose different colors and shapes to suit your mood. Flowers can be found in every season and color. There are 400,000 varieties of flowers! If you’re not a big fan of flowers, you can opt for a more abstract design with more details.
Negative space

If you’re a short girl who wants to make a statement with her nails, negative space nail designs are for you. This fun design features three colors and a blank space in between them. It is playful and avant-garde and can be worn for any occasion, especially during the summer months. Listed below are some easy nail designs with negative space. You can choose your favorite color, depending on your mood and style.
For negative space nail art, use any pattern, color, or style. You can also experiment with different shapes, sizes, and patterns to create an eye-catching design. It is a quick, easy, and inexpensive way to create a great manicure without the time and money it takes for a full-on mani. And since negative space nail designs are so versatile, you can do them yourself!
One of the most accessible negative space nail designs for short nails is a heart. Using various colors and shapes of negative space will make your nails look stunning. Adding rhinestones to this design will add a touch of glamour and drama. The negative space is perfect for adding glitter and rhinestones. These two nail art styles look amazing together! If you are looking for a simple yet stunning design, negative space nail designs for short nails are perfect.


