
- Why Won’t My Gel Polish Cure on My Press-On Nails?
- UV light
- Proper curing time
- Signs of dehydration
- Avoiding acetone-based polish remover
- Brushes for applying gel polish to press-on nails
- Shaking Your Nails Before Applying a Gel Nail Coat
- Shaking gel nail polish bottles
- Cleaning your nails before applying gel polish
- Filing your nails before applying a gel nail coat
- Shaking your cuticles before applying a gel nail coat
- Sanitizing your hands before applying a gel nail coat
Why Won’t My Gel Polish Cure on My Press-On Nails?
Your fake nails may be too long, and your nail polish is not curing. This can happen for a variety of reasons. For example, you might have had a very long natural nail before applying your fake nails. In this case, it might be difficult for your gel polish to cure on your press-on nails. Here are some possible causes and solutions to solve the problem. You can also try UV light and avoid using acetone-based nail polish remover.
UV light
If you’re wondering why UV light won’t cure gel polish on your press-on nails, it might be the UV lamp that’s not working correctly. If the UV lamp is dim or not working correctly, it may be because the gel has been over-cured. Generally, UV light isn’t meant to cure the gel polish on press-on nails. To check the UV lamp’s function, turn on and off the light, and wait a few minutes.
Before applying gel nail polish, make sure that the base coat is completely dry. Otherwise, UV light won’t penetrate the top layer, and the polish won’t cure. If you apply the gel in multiple layers, be sure that each layer is dehydrated before applying the next. Only the top layer will be cured if it’s a thick layer, leaving the lower layers uncured. To ensure that the entire nail is cured, use a thinner layer. Make sure that you fix the gel polish for the recommended time, and don’t cut corners.
If you have already applied the gel polish to your nails, check the base coat application first. Apply a layer of bonder first, followed by a clear topcoat. Put the pin under the UV lamp, which will cure the polish. Once the nail polish has cured, remove it by filing it down. You can always apply the topcoat again if you wish. However, if you want to remove the gel polish, get it done before the UV lamp.
Choosing a lamp with the correct wavelength of light is critical to getting good results with gel polish. You don’t want to choose a cheaper lamp, which won’t work if the UV light is too weak. Make sure to invest in a high-quality lamp that will last longer and save you money. Also, make sure to purchase a light with a bulb compatible with your gel polish.
Proper curing time
Choosing a color for your nail art is crucial if you want your press-on gel polish to look great for weeks. However, the curing time can be affected by several factors. In addition to the type of nail polish, the curing time of press-on gel polish can be affected by the preparation of your nails. Ensure that your nails are clean and free of lotions and oils, as these can create a barrier between the gel and your pin. You should also avoid using expired gel polish, as the ingredients begin to break down after six months.
Another reason why longer curing times are so important is that some brands don’t have inhibitor layers. This is why it’s essential to follow the instructions carefully. Many people opt to cure their gel polish longer than the recommended curing time because they are used to applying regular polish, which takes around thirty minutes to dry completely. However, if you’re new to this process, you may want to check the curing time on the label before starting.
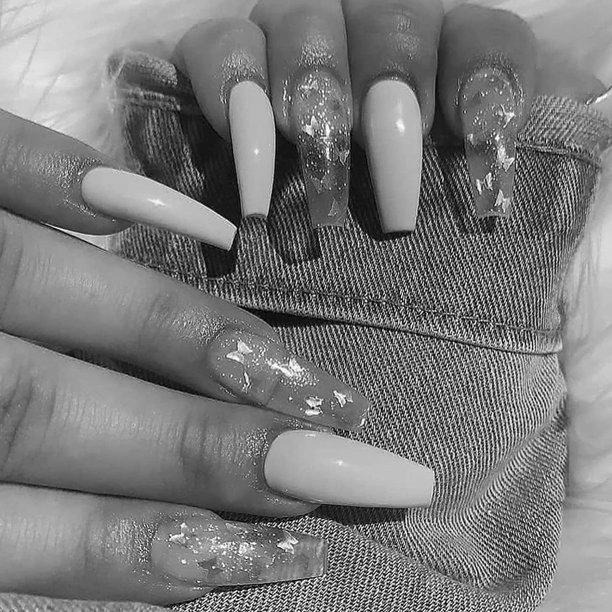
Press-on nails don’t have the staying power of a professional manicure, but they can last for a few days if you’re careful. Just be sure to wear gloves and apply the glue and adhesive in a thin layer. Lastly, don’t forget to clean your hands afterward, as too much of the bond can damage your nails. To prevent damage to your nails, Dr. Debra Jaliman, a New York City-based dermatologist, suggests saving your press-on nails until a special occasion.
It is recommended that you use a base coat of gel polish before applying the top layer of your press-on gel polish. It will make the color last longer and prevent the nail from chipping. Also, you should wait until the layers are dry before applying a top coat of your gel polish. Afterward, cure your nail polish under a UV lamp or allow it to dry naturally. It may take a few days for your nails to harden, so experiment with the colors and layers to find the one that suits you best.
Signs of dehydration
You may be dehydrated if you’ve ever had trouble applying gel polish to your press-on nails. Dehydration is when harsh nail products remove moisture from the nailbeds, leaving them dry and weak. Another common sign of dehydration is white spots, which indicate a mineral deficiency and/or physical damage from acrylics. The solution is to keep the nails moisturized but check for white dots.
After you’ve prepared your press-on nails, it’s time to apply your nail glue. Use a thin layer to ensure a solid hold. If you’re worried about your nail glue, you can always soak your fingers in alcohol for 30 seconds before applying your nail polish. The alcohol will also disinfect your nails. Apply the nail glue thinly and wait 30 seconds before applying the gel polish.
Avoiding acetone-based polish remover
If you’ve applied gel nail polish to your fingernails at home, you’ve probably noticed that removing the top layer is difficult without soaking the affected nail in the acetone-based polish remover. But it’s not impossible to get the gel polish off without damaging the surrounding skin. Here’s how. First, soak a cotton ball in acetone for about 15-20 minutes. Then, gently press the soaked cotton onto the nail to remove excess gel polish.
Another way to remove press-on nails is to use cuticle oil or a cotton ball soaked in cuticle oil. Once the pins are loose, you can use a cuticle pusher to get rid of stubborn press-on. Then, apply a good-quality base coat to avoid tearing or ruining the press-on nails.
Another way to remove the top layer is by filing off the nail with a nail file. While this is quicker and easier than using the acetone-based polish remover, it is also more damaging and may lead to onycholysis, a condition where the nail lifts from the nail bed. Another way to prevent gel polish removal is by filing your nails before you apply it. Filing your nails will also help you minimize the amount of time you spend soaking your hands in the acetone. However, it is essential to note that different gel polish brands are more accessible to remove than others. If you’re unsure which brand to use, ask the nail technician about the recommended brand.
When using acetone-based polish remover to remove your gel polish on press-on nails, you should make sure that you do it with a cotton ball. Acetone is harsh on skin and nails, so use a cotton ball to avoid damaging your nails. A cotton ball also works great for soaking your fingers and nails. It should take about 10 to 15 minutes. When the polish has been removed, the skin underneath it will be dry. Then, you can gently rub the nail with cuticle oil and scrape off the remaining gel polish.
Brushes for applying gel polish to press-on nails
Before applying gel polish to press-on nails, it’s best to make sure your fingernails are thoroughly clean. Avoid using any lotions or hand creams before applying the polish. Next, you should push back your cuticles. Ensure that the polish is evenly distributed throughout the nail by dusting them off with a lint-free wipe. Once you’ve prepared your nails, you can begin by applying the polish to the tip of your thumb. You’ll avoid getting any of the polish pooling at the cuticle by doing this.
A good brush for applying gel polish to press-on nails is one with a medium-grit tip. This will ensure a smooth application and minimize the risk of damaging your natural nail. If you need more nuanced information for applying the glue, you can use a 180-grit nail file to remove the hardened top coat. Brushes for applying gel polish to press-on nails are also available in different sizes.
The brush should be small enough to apply gel polish evenly to your press-on nails. It should be angled to give you a smooth finish. The nail polish should not be so thick that it can’t be removed easily with your hands. If you’re worried about destroying the nails, you can also use an acetone-based nail polish remover to remove the press-on nails. This removes the glue from your nails without damaging them.
Regardless of your preference, you can clean your brush easily at home. The UV Gel brush is typically made with synthetic bristles for easy cleaning and durability. In addition, synthetic bristles also prevent the product from sinking and make the product’s application harder to complete. Once your brush is clean, you can store it in your bathroom. It’s worth it to take care of it if you’re going to wear it for a while since the UV Gel can break the brush.
Shaking Your Nails Before Applying a Gel Nail Coat
Shake the bottle of the gel polish. After it has sprayed onto your nails, you need to file your nails. File both sides of the nail. Be gentle; filing your nails too much will damage the acrylic nail and cause chipping and splitting. You can use a buffer to file your nails to make them smooth for the gel polish. Make sure to use gentle strokes so that the nail doesn’t tear.
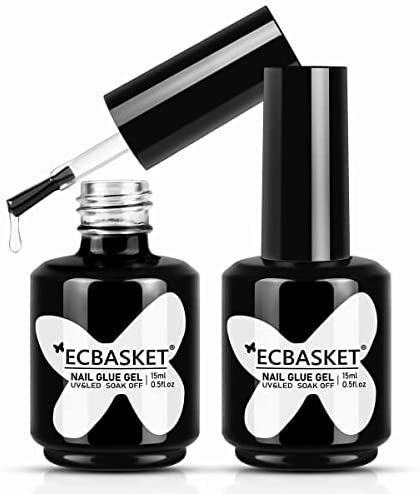
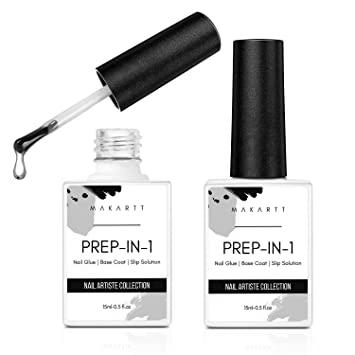
Shaking gel nail polish bottles
Shaking the gel nail polish bottles is essential for blending the pigments evenly. Before applying a new color:
- Shake the bottle before applying the base coat.
- Shake the bottle with the colors you plan to use and the topcoat.
- Shake the bottle before using it to avoid any spills.
- Do not leave it open for a long time.
After applying the gel, close the bottle as much as possible to prevent any air and light from escaping.
Shaking the bottle before applying gel nail polish is common for most nail polish brands. Mixing nail polish is necessary, as it can cause streaks and bubbles if the bottle is not mixed correctly. Most nail polish bottles are filled almost entirely, which means that turbulence in the bottle is minimal. This process is more straightforward with a nail shaker, which can fit into most nail polish bottles and give a 60-second shake.
To get the perfect gel nail polish application, shake the bottle before applying it to your nails. Shaking the bottle before using it will ensure even coverage and prevent bubbles in the manicure. Some nail polish shakers are battery-operated, and others are electric. Decide which style suits your needs and budget best.
When applying gel nail polish, using the best nail polish shaker is essential. This will prevent air bubbles from forming in the nail polish, which can cause it to shrink and leave holes in your manicure. The shaker will keep your nails smudge-free and prevent chips and cracks. It will ensure the consistency of your gel polish application and make it much easier to apply. If you use the shaker properly, you’ll enjoy better results in less than 5 minutes.
Cleaning your nails before applying gel polish
Before you begin applying gel polish, make sure your nails are clean. You can use an acetone-based nail cleaner or a combination of soap and water. You should also make sure there are no oils or debris between the nail and the cuticle. Once you have removed the fat, you’ll be able to apply the gel polish easily. This step is crucial to the success of your manicure. Use the same process when applying your gel polish as you would if you were doing it yourself.
Once you have cleaned your nails, apply a thin layer of gel polish. Carefully remove any excess oil by soaking your finger in warm water and removing the topcoat. Repeat this process for the second layer of color. After the second coat of polish is dry, apply another base color. Finish the process by applying three coats of paint. If your nails are still wet, soak your fingers in warm water and use a nail file to gently remove the gel polish.
Once you have applied the second layer, you can file your nails down to the desired thickness. Make sure to remove the tacky layer to avoid ruining your nail file. Repeat this process until you have reached the consistency you’re looking for. If you’re unhappy with your nails, you can use cuticle oil to prevent them from lifting. When applying gel polish, allow it to cure for at least 2 hours. Otherwise, the gel polish may lift after a couple of days. A gel manicure can last for up to three weeks if done correctly.
While many gel polish products contain toxic ingredients, there are still some better brands. Among these are dibutyl phthalate, formaldehyde, and toluene. While these may seem like a minor concern, the chemicals in gel polish are hazardous and can cause serious health problems. So make sure you follow all the guidelines and use a clean, lint-free wipe to ensure that your nails are free of all impurities.
Filing your nails before applying a gel nail coat

While filing your nails before applying a gel nail coat is an important step, you should be careful not to break the seal between the gel application and the pin. A broken seal will cause the manicure to wear off easier and could cause the nails to weaken over time. Filing your nails makes it harder for the gel application to adhere to your nail, making them brittle and susceptible to breakage.
When filing your nails, use a glass or crystal file. These are soft on the nail plate and won’t ruin the file. File in one direction, avoiding the same spot over. Wait for your nails to dry completely before applying a topcoat. Once your nails have dried, file them again. The gel nail will last up to three weeks when adequately maintained. To prevent your nails from becoming discolored, use top-quality nail polish.
Once your nails are dry, file them lightly to remove any shine and smoothen the surface. A fine file should be used to remove the top layer of the gel. A coarse file is best for the edges of your nails, while a fine file is better for smoothing the surface. If you don’t have a buffer, you can use a regular file. However, be careful not to file your nails too sharply, or else you could risk breaking the gel.
You must also file your nails to make them more appealing. Square-shaped nails should be filed from the side to the center, while round nails should be filed from the center to the edge. Doing this will help maintain the strength of your nails. Using a soft file will smooth out the surface of your nails but will prevent them from becoming too thin. After filing, you can apply a top-quality gel nail coat to complete the look.
Shaking your cuticles before applying a gel nail coat
You must shake the gel nail polish bottle before applying it to your cuticles. The reason is to ensure that the pigments are blended evenly. You should do this before using the color coat or base coat and the top coat. Otherwise, you will find that the polish sits unevenly on the bottle, and it will be harder to spread and gather evenly on the nail. Moreover, applying a top coat or base coat will be difficult without shaking.
You should also ensure that you don’t paint the nail tips with gel polish. It is because it will lift and peel away the gel polish layer from your nail tips. You should shake your cuticles well before applying a gel nail coat to prevent this problem. After doing this, use a cuticle moisturizer, which you can apply to the cuticles. The moisturizer must not touch the nail’s surface, and it will also make the cleanup easier.
Moreover, the gel polish is light-sensitive, and if you expose it to natural or UV light, it will harden. Shaking the bottle before each use will help you keep your manicure fresh for longer. If you forget to shake your bottle, you’ll end up with an unsealed manicure. So, shake the bottle well before you apply it. You’ll need to repeat the process until you’re satisfied with the result.
Secondly, you can use cuticle oil or cream on your cuticles to help prevent them from drying out. These products are available on the market, and the OOO Polish Gel Top Coat does not require cuticle oil or wiping. You can get more information on these products HERE. So, do not wait any longer! Get the perfect nails. You’ll be glad you did.
Sanitizing your hands before applying a gel nail coat
A hand sanitizer is an essential item in the pre-application process of gel nail coats. While classic gelling agents are resistant to polar alcohol groups, these products will break down your nail polish, leaving your manicure vulnerable to chips and cracks. Hence, it is essential to sanitize your hands before applying gel nail coats. A good hand sanitizer is liquid antibacterial soap with water.
You can use hand sanitizers with or without alcohol, but it is advisable to use hand sanitizers that contain a high concentration of alcohol. This is because alcohol helps break down the outer coatings of bacteria and viruses. Therefore, you should use a hand sanitizer containing at least 60% alcohol. It is essential to avoid contact with the hands and nails of people with skin problems before applying a gel nail coat.
Hand sanitizers do not kill bacteria but can make your skin dry. According to microbiologist David Coil, dry hands are more prone to infection. If you must use a hand sanitizer, limit the application to one time per contaminated hand. Overuse can damage your hands and make your hands more susceptible to irritation. To avoid causing further damage, always wash your hands thoroughly before applying a gel nail coat.


