Geometric nails

A square nail design can look great on nails because it uses a prominent shape, the quadrilateral. You can paint the nails with black and silver squares or use half-squares to add some interest to your nail beds. You can also paint overlapping squares or rhombuses or use intersecting lines to add more dimension. The possibilities are endless! And if you’re not sure which color to use, try different shades of the same color.
You can use an orange color to make a simple geometric nail design. You can also draw long, slender triangles and fill them with glittered nail polish. You can also create an ombre geometric nail design using a peach or nude nail polish and then add a rhinestone to complete the look. For a more complex structure, try combining light shades with neon colors. A simple geometric nail design can look just as gorgeous as one that incorporates more intricate shapes.
Flourishes

If you’re looking for a fun manicure that’s still sophisticated enough to wear out of the house, consider adding simple nail art flourishes. These designs give your nails a ’90s Clueless vibe and are a great way to create different looks in one day. You can also make your nail art look more elaborate by incorporating various textures, glitter, and gem accents. You’ll need a striping brush and a burnt-red nail polish to get this look. Dip the meeting in the polish and paint squiggles from corner to corner. When applying daisies, be sure not to overlap them.
Checkered prints

If you are looking for a chic alternative to monochrome nail designs, consider adding checkered prints to your manicure. Whether your taste is retro, emo, or Nascar-themed, varied patterns are always in style. Depending on your personality type, you can opt for simple or complex designs, varying the color of the checkers. In addition to traditional checks, you can also experiment with houndstooth prints.
When choosing colors for your nails, choose one that complements your skin tone. Baby blue goes well with various shades, including tans and browns. Cow spots are easy to add a modern twist to a classic animal print. You don’t have to go overboard with glitter. The most basic designs feature one or two accent nails. You can add chevron or flocked accents to any other pin.
The reverse floral design is a perfect example of this. A red background is complemented by a white flower, giving this manicure a fresh twist. A classic French manicure gets an update with this fun design. White checkered prints and floral art are a combination of jazzy and straightforward. It adds a pop of color and a fun twist to an otherwise basic manicure. You can wear this nail art with any outfit – it will definitely make your friends ask you where you got the flowers!
Geometric patterns

One of the easiest ways to create simple geometric designs is to use nail polish. All you need is a transparent varnish or a base color that matches the color of your nails. Then, apply a piece of self-adhesive tape to the pin in a geometric pattern. It could be a single line dividing the nail into two sections or two strips dividing it into three or four parts. Be sure to adhere the tape firmly to the pin.
Another simple geometric nail art design is made using nail stamps. This technique only requires a few tools and takes ten minutes to complete. However, it is essential to have a stencil or design available. To make a clear stamp, you must have a nail art stencil. Then, apply a top coat of clear nail polish to ensure the manicure lasts long. Then, repeat the same procedure using another nail polish.
Heart nails

If you’re looking for a simple heart nail design that’s simple to do at home, look no further than the zebra design. These heart designs combine black and white stripes with a red heart to create a stylish frame. You can use either nails or toothpicks to create this design. After painting the base color on your nails, make 3 triangle-shaped dots. These will serve as your reference point when putting on the heart frame.
If you have short nails, you can always try a simple XO heart design with a mix of hearts and XOs. A small jewel is a perfect touch to this design, adding a bit of bling. This design is ideal for valentine’s day, as the colors are the traditional color combination for this holiday. If you’re feeling extra creative, you can try a mini heart design with a few stickers. You can choose a classic white and red nail polish combination or use varying shades of red to add more bling. A white dress and red lipstick make these designs even more stunning.
Fluorescent nails

If you’ve ever seen someone wearing fluorescent nail polish, you know how eye-catching and bold it can be. The bold color of fluorescent nail polish will draw everyone’s attention to your hands while highlighting your manicure’s shape. Whether you’d prefer a neon color that stands out on your fingertips or a matte finish that blends with a clear or nude base coat, you’ll find fluorescent nail polish designs to suit any taste.
If you’re unsure how to apply fluorescent nail art, don’t fret! There are many ways to use this design, and you can even make it more durable with negative space. You can even add a smiley face embellishment to your feature nail. This bright design will remind you to look on the bright side! You can add a few glittery accents and a glittery top coat to give your manicure an extra pop for even more fun.
Geometric prints

A geometric print is one of the most common nail art designs. It’s an excellent design that looks chic. This design has been around since 2012. It has recently evolved into a more subtle and sophisticated look. Try it on a finger or toe for an instant makeover. This nail art design can be achieved in various colors and styles. Here are some tips for creating this look. You can use a dotting tool or a striping brush.
Nail artists often choose pastel colors for geometric prints. These shades provide a unique look, and the contrast of white and black creates a dazzling look. Geometric patterns will complement any look. They are also simple to make and help you get a quick manicure. Geometric prints are perfect for summer and are easy to apply. You’ll look fabulous if you have a geometric nail art design that you want to wear to an event.
Floral prints

If you have an artistic flair and good hands, you can create these gorgeous designs easily. First, you need to trim and file your nails to the desired shape. Apply a base coat to the nails to smooth out any irregularities. Next, paint your nails with a base color. Allow the base to dry before you add your flowers and leaves. Use a light-colored base as your background for a more striking effect.
Another way to create these gorgeous nail designs is with flower stickers. You can find these in abundance on Etsy. Using yellow and white nail polish will make half flowers. You can also use different color combinations to create a beautiful manicure. For added effect, you can add rhinestones to your design. You can find many floral rhinestones on Etsy. Once you have chosen the suitable nail polish, you can apply floral stickers to your nails.
Beginner’s Nail Art Ideas

If you are a complete beginner in the art of nail art, you might be confused about which designs are best for you. Here are some tips for beginners on nail art:
Black and white designs

If you are a beginner who loves art and design, you should start by applying a base coat to protect your nails. It also helps in enhancing the designs on your nails. After applying a base coat, you can start applying your nude nail color and design. Use a toothpick to draw dots on your nails, leaving spaces between each bead to achieve this look. Repeat this step until all your nails have been covered with a nude color.
Graph print: If you love animals, you might enjoy the black and white designs. The jungle cat print is a classic example of this design and never goes out of style. If you’re not very artistic, you can try the houndstooth design, which is eye-catching and easy to replicate. Another design that looks great but requires artistic skill is diamonds, which are every girl’s best friend. Drawing a diamond on your nail is close to the real thing, but it will require more time and a steady arm.
Besides black and white, you can also use white nails to try Native American-inspired designs. They’re easy to follow and will draw the eye of anyone who sees them. You can wear these designs even while you’re doing household chores. These designs can be amusing and elegant. These are the best ideas for beginners. There are many different ways you can try these nail art designs. The most popular ones include the following:
Dots & Stripes

If you are new to nail art, you should start with simple designs. Several beginner’s nail art ideas include stripes and dots. The dotting method is a great place to start as it creates a playful, fun effect. Dip a dotting tool into a small amount of nail polish. Hold it at an angle so the dots don’t overlap. Then, use the dotting tool to make stripes and dots in patterns or randomly.
Striped nails are a classic and versatile design. Start by painting the base color. After that, paint the stripes in different colors. You can also use the brush to make various shapes, thicknesses, and angles. You can experiment with varying combinations of color and even use a matching chart to make sure the colors don’t clash. Try these beginner’s nail art ideas! You’ll be amazed by the results!
Another basic design is to use a band-aid. The band-aid’s hole is the perfect nail stencil, and the band-aid can be painted over to reveal perfectly sized mini polka dots. To add more fun to your nails, you can dip a bobby pin into the nail polish and use it as a dotting tool. Top your design with a topcoat, and you’re good to go!
Color blocking

One of the easiest ways to give your nails a dramatic look is to use two colors. Use a small nail brush to add one color and then another on the same pin, then repeat. It’s that simple! Color blocking is a perfect design for short nails. To achieve this effect, you can use nail paint or a toothbrush. Experiment with different colors and shapes until you find the look you love.
Try a simple color block design if you’re not sure what colors to use. The most common color combination for color blocking is three shades of the same color. A bright white or pastel pink makes the perfect contrast to a drab pastel or neutral color. However, if you want a rock star look, you can use dark colors. Alternatively, you can try a gradient of two colors – one dark color and one light one.
Try different colors and use them in combination. Try different combinations and experiment with different colors! For example, you can try creating abstract shapes with varying shades to give your nails a unique look. You can also try a modern twist on French tips.
Flower artwork

If you’re a beginner in flower nail art, you may be confused about what tools you will need. You’ll need a dotting tool and detailing nail art brush. The latter should be used to practice creating thin lines and dots. Practice on a nail wheel or a piece of paper first. Once you’ve mastered making beads, you can try this flower nail art design. For a flower design, you’ll need two coats of orange nail polish. You should ensure that the orange polish is opaque. Finally, you’ll need a white dotting tool.
Depending on your desired look, you can use multiple colors to create this type of design. Choose one color as your base, the center of the flower, and a third for the petals and stem. When finished, use a top coat for a lasting sheen. In addition to a strong base coat, use a clear topcoat to protect your nail art. Use the following images for inspiration:
You can use a dotting tool to create a five-petal flower, a classic spring flower. This design is easy to achieve and reminds us of childhood drawings. Optional accessories are a matte topcoat, silver rhinestones, and pale blue nail enamel. For beginners, flower nail art is a great way to celebrate the changing seasons. You can find inspiration by exploring Instagram and scoping out nail studios near you.
Spirals

Spirals are perfect for beginner’s nail art ideas because they are accessible and stylish. You can paint them on your fingers and toes for a simple yet elegant look. If you don’t want to go overboard and spend a fortune on nail paint, just pick one of the many colors available and try it out! You can use different colors for each spiral, depending on your personal preference.
Spirals are great for beginners because they are straightforward to replicate. You can create them using various colors, including white and black. Or you can make them look a bit more complicated by using multiple colors. You can also create animal prints by using several colors and different shapes. For example, if you want to make an animal print, use three different colors for the stripes and wiggly shapes. If you don’t like animal prints, you can try tiger or zebra prints.
Another way to create a floral design is to use a toothpick or dotting tool dipped in a different color. If you want to make a flower with lots of petals, you can use different colors. Try mixing up red, yellow, and green to create a contrast. Afterward, you can use clear nail polish to cover the nail art and give it a glossy finish. This looks beautiful and makes the nails look very stylish.
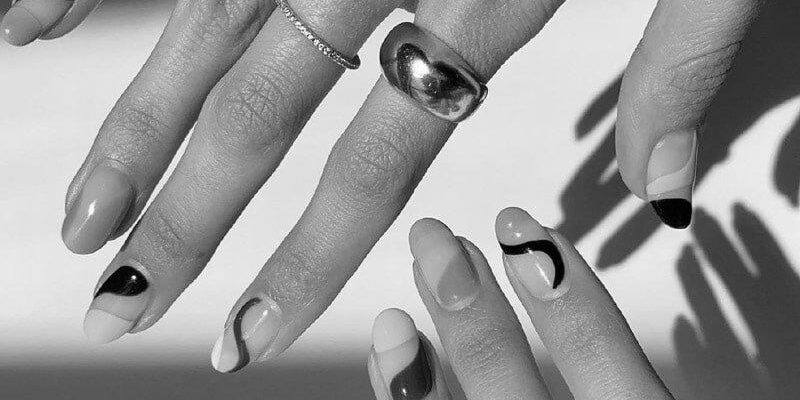
Squiggles

Squiggles as beginner’s nail arts are the latest trend in nail art. Inspired by wavy lines and abstract doodles, these designs are doable, fun, and funky! Moreover, nail art has become a booming industry, with a nail academy and professional nail salons. Regardless of your experience, you can try these designs on your nails and ace the look. Whether you’re a complete beginner or a skilled artist, squiggles are easy to learn and can be easily adapted to your own personal taste and style.
Squiggles are perfect for beginners because they are easy to create. You can choose from many designs, such as polka dots, flower artwork, and abstract squiggles. Whatever your style is, there’s a design to suit you. Squiggles can complement all nail shapes and colors. Beginners can also practice this design at home with some practice. You can also find tutorials and guides on nail art online.
Squiggles are an excellent option for beginner’s nail art if you aren’t confident with your hands. You can practice squiggles on your nails before moving on to more complex designs. Then, once you’ve perfected your technique, you can use squiggles to create fun, vibrant designs. In just 15 minutes, you can have a beautiful and creative design on your nails.
Triangle design

If you’re a novice at creating nail art, the triangle design is a great choice. This nail design is easy to make and requires no other supplies besides some scotch tape and gold nail polish. Here are some easy steps to complete this design. Once you’ve mastered the basics, you can start practicing with your friends and family! You can also experiment with different colors and plans for a more detailed look.
Start applying a nude base color to your nails to make this simple design. Next, place reinforcement stickers near the cuticles and apply black glitter or metallic black to your nails. Finally, apply a top coat to protect your manicure and complete your look. You can also use two different nail polish shades to create a triangle design. This design is perfect for any occasion. It’s simple and beautiful and will impress even the most intimidated friends and family!
The triangle design is straightforward to create and requires a lot of patience to achieve. Start with a white nail base and paint a thin layer of light pink on top. Next, use striping tape to create random lines across your nails. Once this drys, you can complete the design by drawing parallel lines across your nails. You can use multiple shades of green to create a unique look.


