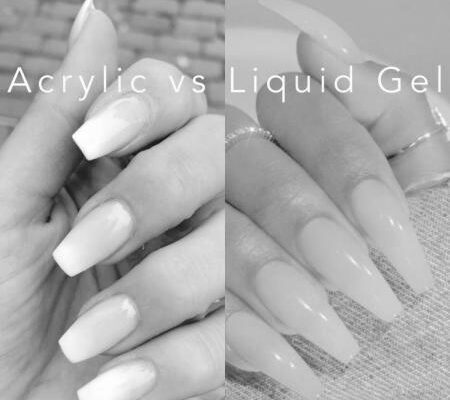
What is the Difference Between Acrylic and Gel Nails?

If you’re still unsure about the differences between acrylic and gel nails, you’re probably using the wrong chair. These two systems are powders and liquids, and if a nail technician can’t identify the difference between them, they’re probably using the wrong chair. This article will discuss the significant differences between acrylic and gel and what to look for when choosing between the two.
Less expensive

If you want beautiful, long nails but are on a tight budget, consider gel or acrylic nails. These nails are more expensive, but each has different benefits and weaknesses. Listed below are the pros and cons of both types of nails. Which style is right for you? Whether you prefer a soft gel or a hard acrylic nail, the cost will determine which treatment is best.
While both types of nail polish have different benefits and drawbacks, you should keep in mind that acrylics are generally more complex than gel. They are made by mixing a polymer powder with liquid. Once mixed, acrylics can be molded into various shapes. Acrylics are also available as dip powder, but these are harder to remove. Moreover, both types of nails require UV or LED lamps to dry.
Although acrylics are more durable than gels, they have disadvantages as well. Acrylics may look more natural than gels, but they may have less flexibility. If you have short nails, you may want to choose gel nails. They are more affordable than gel nails. While both types of pins are durable and look good, gels can also cause irritation to your nail bed. Gels can also last longer than acrylics but are less stable than acrylics.
Acrylic nails can also become brittle while still challenging, which can break easily. Acrylic nails also tend to thin out your natural nails. Getting them done can take a long time, so it is best to avoid using them for extended periods. These nails are also tricky to remove – you’ll need to use strong glue. If you want to change your look, you can go for a more natural-looking nail.
Lasts longer

When deciding between acrylic and gel nails, you’ve probably wondered which is better. While both are good choices for a fun new look, acrylic nails last longer. Besides, they’re both easy to remove. On the other hand, Gels need a UV Nail Lamp to cure. Whether or not these lamps are necessary will depend on the technique and preferences. Gel nails are also cheaper than acrylic nails.
Acrylic nails are made from methyl methacrylates, a substance similar to dental products. Once molded into a bead-like shape, it hardens in the presence of air. These nails don’t require UV light to set. However, they require regular maintenance and polishing to keep them looking fresh and vibrant. For this reason, they last longer. Despite their shortcomings, the benefits of acrylic and gel nails are undeniable.
Acrylic nails tend to last longer than gel nails, but you should still take care of them properly to ensure that they stay looking beautiful. You should consider visiting a nail salon for a fill-in every two to four weeks. You’ll have to make appointments every few weeks, and if you’re not careful, your nails will lift or peel sooner. Also, acrylics are more likely to cause allergic reactions.
Although acrylic nails are more flexible than gel nails, they’re more costly. For this reason, if you’re a heavy-handed nail wearer, gel nails are a better choice. They’re less likely to chip or damage your natural nails than acrylic ones. And because they stick to the nail bed better, you can wear them for a more extended period. The key is to decide which is best for you.
Looks more natural

When deciding between acrylic and gel nails, consider what you want your nails to look like. Acrylic nails are much more durable, and gel nails last longer. Gel nails are also more flexible and durable, and they cure faster than acrylic nails. Both have pros and cons, so it’s essential to consider your lifestyle and budget before deciding which one is right. Acrylics are the more expensive choice, but gels are easier to remove if you change your mind.
The gel is softer and more flexible than acrylic. Some gels can be removed with a soak, while others are permanently applied. While acrylics are thicker and less elastic, gels tend to look more natural and last longer than acrylics. However, one downside to gel is that it exposes your hands to UV light for a few hours. If you don’t mind this, gels will work fine for you.
In terms of appearance, gels are more natural-looking and healthier. Both acrylic and gel nails are made of identical monomers and polymers. However, oligomers are added to the mix to make them less rigid and natural. These nails also look glossier than regular nail polish, and they’re less likely to chip or become messed up after you leave the salon. People with acrylic allergies may find that gel manicures are the best choice.
The main difference between acrylic and gel nails is how the nail is painted. Gel nails are applied to the natural nail and cured under UV light. A glossy manicure that lasts up to 14 days without chipping or peeling. The gel nail polish may peel away at the corners in some cases. Both options are effective for a short-term solution to a long-term cosmetic problem. However, both types of nails look more natural when they are painted.
Is safer

A critical difference between gel and acrylic is their consistency, and many nail technicians can tell the difference between the two just by glancing at their clients’ hands. Acrylics are a liquid, while gels are gels. Nail technicians may also see where the gel starts and ends on the nail plate and file it away carefully. While both systems are generally more expensive than gel, some nail technicians may prefer acrylics due to their consistency and ease of application.
Although acrylics are softer and more flexible, they are not as long-lasting as gels. In addition, they dry faster than acrylics, which means that they are less likely to chip. Gels also do not produce a strong odor during application, which is a bonus. Also, they last up to two weeks. Gel nails are also much safer than acrylics, as UV rays can cause damage to the skin and can cause pain to the nail bed.
Gel nails are longer-lasting than acrylic nails and can help you experiment with various nail trends. Acrylic nails may be more versatile, but nail styles and techniques differ from person to person. Incorrect application can result in chipped or broken pins. While acrylics are generally more flexible, gels are not. A gel manicure can be the perfect solution for those who are sensitive to acrylics. Depending on your needs and budget, you can choose between acrylic and gel nails.
Acrylic nails can cause damage to the natural nail, but it is not as permanent as people think. Professionals will install and remove the acrylics with care. However, it is essential to remove acrylic nails properly because the chemicals may damage the natural nail. It is necessary to allow your nails to breathe and rest between applications. You should also make sure to allow yourself time to go between appointments. The difference between acrylic and gel nail treatments is significant.
It is easier to remove

When it comes to removing acrylic or gel nails, one method is more straightforward. If you’ve already applied the nail polish, soaking them in acetone for 20 minutes should remove the gel and lift them partially off your nail. If you have applied for gel extensions, you’ll need to use a special orangewood stick to carefully push them off the nail. Otherwise, you’ll have to file back and forth across the gel, taking 10 minutes per nail.
The most significant difference between acrylic and gel nails lies in the removal process. The gel is softer and more flexible than acrylic and is generally easier to remove if the nail technician can identify the products. While acrylic requires mixing as you apply it, the removal process is usually more straightforward because you’re not dealing with hardened polish. If desired, you can also tone down gel nails with nail lacquer. Once you’ve decided which method is easier to remove, it’s essential to know that both ways will damage your natural nail.
If you’d rather not spend money on a removal kit, you can remove acrylic nails at home yourself by following a few simple steps. Firstly, you need to wait 15 minutes to remove the acrylic nail. After that, use an orangewood stick to push away the cuticles. Finally, buff and file your nail. And don’t forget to wash your hands thoroughly! It’s much easier to remove acrylic nails than gel nails, so give it a try.
If you’d prefer a manicure that lasts for days, go for a gel nail over acrylic. This will give you longer nails with glossy color. But remember that removal of gel nails is a bit more complicated than nail polish. It’s important to remember that applying gel over acrylics requires extra care, and the methods used for your natural nails might not work with acrylic nails. You should also consult a nail technician for help if you’re unsure what to do.
Is it Bad to Apply UV Gel Polish Without a Base Coat?

What is the downside of applying UV gel polish without a base coat? It won’t last nearly as long. It chips, peels, or lifts. Luckily, there are some solutions to these problems. Read on to discover why. Then, you can decide whether or not you want to try UV gel polish yourself! Here are some of the things to look out for.
Doesn’t last as long

Your manicure won’t last as long if you don’t use a base coat before UV gel polish. The reason is simple. A base coat prevents UV gel from penetrating your nail plate. It also seals your manicure. UV gel polish doesn’t last as long if it doesn’t have a base coat. There are a few solutions to this problem.
The first step in UV gel manicure involves applying a base coat to your nails. Gel base coats are water-based and resemble glue. They bond to your natural nail plate. A UV light cures each coat of gel polish. It doesn’t dry completely, so it’s essential to use one before applying the second layer of color. A base coat is a must for a long-lasting manicure.
If you don’t want to use UV light, you can buy no-light gel polish. This will give you a gel-like look that lasts for a few days. However, it won’t last as long as UV/LED gel polish. Also, you won’t need to worry about your hands being damaged by the UV light. No-light gel polish will dry and peel off faster than regular gel polish.
Get a UV gel manicure if you haven’t followed these steps before. Start by washing your hands before you have the treatment. Leaving them unwashed for even a few hours can make UV gel polish peel or chip. This is why it’s so important to remove any excess oil from your nails. In addition, washing your hands before a UV gel manicure can also make the nail bed shrink.
Chips

Unless you are going to apply a top coat over your nail polish, you’ll have to take the time to use a base coat. A base coat bonds with your natural nail and keeps the colored gel polish on your nails longer. Without a base coat, your gel polish will lift prematurely. You should buff your nails to make them as clean as possible to prevent this. Apply a base coat before you start applying the colored gel polish.
To prevent chips and peels when applying UV gel, make sure you have a good base coat on your nails. UV polishes can be very chip-prone. Using them without a base coat can peel off your nails and leave you with a mess. Ensure you have a clean, dry surface for your UV gel polish to prevent this. Applying a base coat before UV gel polish is crucial to avoid chips.
DIY kits don’t come with any instructions. Many do-it-yourself kits lack warnings about skin contact and poor-quality lamps. These lamps are unlikely to give the proper cure. Even if they come with an MSDS, they are not guaranteed to provide the correct treatment. To avoid these common problems, choose a top-quality UV gel polish kit. It is well worth the investment!
Peels

If you have applied UV gel polish to your nails without a base coat, you’ve probably noticed that it will eventually peel. This happens for a variety of reasons. In some cases, the gel polish didn’t properly cure the nail surface. In these cases, the UV lamp has failed to provide adequate curing. In other cases, you may have over-filed or damaged nails, which will cause the gel polish to peel more easily. If this happens, you should soak your fingernails in a 50/50 solution of pure acetone and 99% alcohol.
Another reason UV gel polish doesn’t last as long as you’d like is because you didn’t do a good job preparing your nails for the application. The most common mistake is not having a base coat on your nails. Many people don’t bother with this and peel their nail polish too soon. Using a 220-grit nail file on your nails is essential before applying the gel polish. This will create a rough surface for the UV gel polish to adhere to. Make sure to pay special attention to the areas that tend to peel and the edges of the nails.
A common issue among beginners is UV gel polish that peels off in one piece. This is caused by improper curing of the gel layers. This could be the base coat or the gel color. If this happens, the gel polish will not adhere properly to the nail, causing it to peel as a whole piece. There are several reasons for this, but a few common mistakes can cause this problem to occur.
Lifts

You can prevent lifts by adequately preparing your nails and applying the right amount of polish. Once applied, you should let it dry completely. If you do not have time to wait for the polish to dry, you can always use a cuticle clipper to remove the lifted part. This will allow the rest of your nails to recover and give you a more even finish. Make sure to use rubber gloves when you apply gel polish.
To prevent lifts when applying UV gel polish without a topcoat, you must remove a portion of the nail. Once this is done, you can file down the pin to the desired thickness. You may want to repeat the application process as many times as necessary until you have achieved the desired consistency. When applying gel polish, using the correct amount of gel is essential, as too much will result in unevenness and lifting of the finished product.
Before applying UV gel nail polish, prepare your nails with a base coat. This will prevent lifts and peeling. You should also clean your nails and cuticles with acetone before applying gel polish. Then, you can begin applying UV gel polish. It will last longer and adhere better. Remember that a good base coat will prevent lifts when using UV gel polish without a base coat.
Doesn’t adhere as well

If you’ve used UV gel polish on your nails, it can be a bit more challenging to apply than average. UV light initiates a polymerization reaction in the gel that hardens the polish. However, some people wonder why UV gel polish does not cure properly even after a few minutes of exposure to UV light. This problem can be caused by several factors, including the brand of UV gel polish you’ve purchased, the curing process, or even the polish itself.
First, the base coat is necessary for adhesion. Adding a base coat helps UV gel polish adhere to your nail surface. Without a base coat, the nail polish will stick to the finger and not the skin or the cuticles. It’s also essential to ensure that the client doesn’t touch their face or hands right before the process. Without a base coat, the UV gel polish will not adhere.
UV gel polish without a base coat doesn’t adhere as well as UV gel polish with a base coat. If you’re not a base coat fan, don’t be afraid to experiment with the ingredients. The best UV gel polish will not be an intense color without a base coat. It will simply be less effective and not adhere as well. So, when in doubt, don’t be afraid to experiment and try out different combinations until you find the perfect variety of colors and consistency.
Sticky after curing

When you apply UV gel polish to your nails, you may notice that the surface is sticky. This is the result of the gel polish going through the curing process. If you don’t want your nails to be moist, you should opt for LED nail dryers instead of UV lights. LED lamps usually cure gels in 30 to 45 seconds. Additionally, they tend to last longer than UV bulbs. Many gel polish brands are designed to cure both UV and LED lights, but some may only cure in UV lamps.
One of the most common reasons why gel polish can become sticky after curing is that there is too much oxygen in the air near the top layer. This oxygen can interfere with oligomer linking, which forms a rigid polymer. The light-curing process occurs below the oxygen layer so that the gel below does not stay sticky. This problem is more likely to occur with darker polishes, so it’s best to apply them in thin layers to reduce the risk of peeling.
You can use acetone or nail polish remover to remove the sticky layer. Use 100 percent acetone when applying the acetone to your nails. If you don’t have acetone on hand, you can use any household product with a high concentration of alcohol. Hand sanitizer, perfume, or Lysol are all excellent alternatives. DIY methods will not work as well as a professional cleaning solution, so it’s best to leave that to the professionals.


