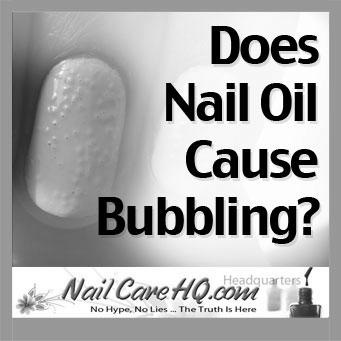
What Causes Gel Polish to Bubble After Application?

If you’ve ever wondered, “What causes gel polish to bubble after application?” you’re not alone. This common problem can be caused by many factors, including short strokes, UV lamps, evaporation of liquid chemical ingredients, and preparation. Let’s explore a few more common causes of bubbles and wrinkles. The good news is that you can fix this problem yourself – and keep your nails looking great!
Short strokes

There are a few reasons why gel polish can bubble after application. You may have applied too thick of a coat or not have allowed the previous coat to dry completely. Another reason why bubbles might occur is that the polish is too thick, and you could not apply a clear base coat. Another reason could be that the nail polish you used is expired. You can dip your finger in ice-cold water during the application process to prevent bubbles from occurring.
In addition to short strokes, thinner nail polish is recommended. If the polish has already dried, it’s too thick and will cause the gel polish to bubble. This is especially problematic if you’re using old polish, usually wider than new gel polish. If you don’t want your nails to bubble, use thinner nail polish, but remember that this will cause the gel polish to dry more slowly. If you have thin nails, you’ll likely need lighter nail polish.
Another reason why gel polish can bubble after the application is improper curing. Incorrect curing can lead to bubbles as the air gets trapped between layers of polish. Also, make sure to use the correct amount of light for the job. When curing gel polish, it’s essential to use the proper light intensity. The light should be bright and long-waved. If you don’t use the appropriate amount of light, the gel polish will be too thick and won’t cure properly.
Generally speaking, there are several reasons why nail polish may bubble after application. It could be improper preparation of the nail surface, too much or too little polish, using a too-hot UV lamp, or placing the nails in the wrong position under the light. When applying gel polish, always remember that short strokes will result in wrinkles. However, you should avoid doing this to prevent bubbles, as it may be difficult to remove the polish.
Evaporation of liquid chemical ingredients

A common cause of gel polish bubbles after the application is evaporating the liquid chemical ingredients. As the gel polish comprises several components, the different liquids evaporate at different rates when exposed to heat. This can cause polish to become thick, challenging to apply, and not heal very well under UV light. Also, thick gel polish can fold and wrinkle after application and will not last long.
Air bubbles are caused by the evaporation of the monomers and oligomers in the gel. As the polymer cures, the air is drawn into the polymer film, forming bubbles and wrinkles on the surface. To avoid air bubbles, apply a thin layer of gel polish and wait for the cure time. Otherwise, use two or three thin coats.
After application, the process responsible for gel polish bubbles involves a complex chemical reaction. Liquid chemical ingredients evaporate due to a reaction between the ultraviolet light and the gel polish. The result is solid nail polish. However, this process can cause some discomfort. In the long run, it will save you money and time. If you suffer from frequent nail polish bubbles, contact a salon right away.
Another common cause of bubbles and wrinkles in gel polish is an overly hot UV lamp. The heat in the gel polish lamp can cause the polish to become thick and separate the layers. You can solve the issue by using a fan or a more substantial top coat. If the problem persists, try applying a new base coat. Then cure it again. If necessary, repeat the process.
UV lamps

If you’re wondering if UV lamps can cause gel polish to bubble after application, you’re not alone. There are several reasons why UV lamps can cause your gel polish to bubble after application. These include insufficient UV light and incompatibility between the gel and the light. However, no matter which reason your UV lamp is causing the bubbles, there’s a simple way to determine if it’s the UV lamp’s fault or not.
Insufficient UV light will reduce the quality of the gel polish. LED-type lamps produce more energy than fluorescent bulbs, and the UV lamp will gradually diminish over time. The result is under-curing of the gel polish, as the surface will first cure. If UV light is insufficient, the nails will dry first, which causes the polish to bubble. Even if the application has been finished properly, the UV light might not be strong enough to cure the gel polish completely.
Another reason that gel polish bubbles after the application is improper curing. Whether the UV light was placed at the wrong angle or the light intensity was incorrect, the result is that the gel polish bubbles after application. The proper curing will prevent the polish from cracking and make it last longer. This problem can be prevented by using high-quality gel polish and a UV lamp. If you’re having trouble with this issue, consider upgrading your UV lamp.
Despite these risks, there are a few tips that will ensure the quality of your UV lamp and the longevity of your gel polish. First, make sure you’re using the correct wattage UV lamp for the color you’re trying to create. Make sure the UV lamp doesn’t exceed 2,000 watts. If your nail polish doesn’t dry properly, you’re risking damage to the topcoat. To avoid this, try using a polish tester. Another great way to check the quality of your UV lamp is by applying a dark color to your nail to ensure a deep-looking finish.
Preparation

The reason why gel polish bubbles after application are due to improper preparation. The nails and cuticles should be cleaned thoroughly with alcohol during the application process. If the cuticles or skin around the pins are still moist, you can use a light buffing technique to remove excess moisture. The alcohol used in cleaning should be lint-free and dry. Once your nails are dehydrated, you can apply the gel polish.
Another common problem is improper preparation. If you do not apply the polish properly, it likely bubbles and chips. Inadequate preparation will increase the risk of bumps and scrapes. A dirty nail base is the number one cause of this problem. It’s essential to avoid filing nails, as this can create tiny particles on the nails. Also, if you file your nails before applying the gel polish, this will exacerbate the bubble and chip problem.
Use a base coat with similar color as the gel polish. Then, apply the gel polish to the nails using thin layers. After applying the polish, be sure to wear gloves to protect your hands. Alternatively, you can choose to cover the bubbles by using rhinestones or nail decals. You can also choose to wear a pocket to conceal the bubbles.
The reasons why gel polish wrinkles or bubbles after application are many. If you do not follow these steps, you’ll end up with a messed-up nail that will be difficult to remove. To prevent this problem, you must follow some easy steps. Ensure that the nail surfaces are clean before you apply the gel polish. If you’ve followed these simple steps, you should be able to prevent bubbles and wrinkles after gel polish application.
Storage

Gel varnish is incompatible with wet nails, and even one drop of water can ruin an otherwise perfect manicure. For this reason, you should use a primer on wet nails before applying the gel polish. After the primer has been applied, you can add a thin layer of the topcoat using rubbing movements. To complete the look, repeat the procedure with the coat. If bubbles appear on the nail, you may need to repeat the application process.
After the application process, store the gel nail polish in a dark, cool place, and ensure the lid is tightly sealed. Be sure to hold the bottle upright to prevent leaks. Keep it away from direct sunlight, heat, or flame to avoid damage. During long-term storage, you should shake the bottle well to mix up the layers of gel polish. If the layer of the nail polish is smeared or stringy, discard it immediately.
To avoid the possibility of nail polish bubbling, store it at room temperature. Avoid placing it in the refrigerator, as this causes the formula to thicken. This makes it harder to apply and is more likely to bubble. Cupboards and drawers are great storage solutions. If you’re worried about smearing, store the nail polish in a dark, cool area, not in the sun. Ensure that you don’t keep the nail polish upside down because this can cause crashes.
To avoid air bubbles, store the gel polish upright in a dark room. Its chemistry isn’t adapted to extreme temperatures, so it’s best not to hold it in the fridge. Remember that summer temperatures can cause the gel polish to warm up a bit. However, it can still be kept chilled before application. Avoid direct sunlight and heat as these will vaporize the solvents and cause air bubbles.
Why Do Gel Nails Burn?

You’re not alone if you’ve ever wondered why your gel nails have burned. This common problem can stem from several causes, including excessive heat, over-filing, and UV lamps. Luckily, there are some easy ways to fix the problem. Listed below are some tips to avoid nail burn. Consider the following information before booking an appointment for a manicure or pedicure. Read this article to understand more about the process and avoid getting burnt nails.
Polymerization

The curing process of gel nails creates a significant amount of heat. The temperature typically reaches about 105degF, but this can quickly rise to 115degF, 120degF, and even 150degF when the speed of the chemical reaction goes awry. These temperatures are painfully close to the boiling point of water. It is helpful to understand how gel nails work and their science.
A common cause of gel nail burns is the improper application of the gel. Incorrect application of the gel product or incorrect lamp settings can result in a spike in heat. Also, a thick application can result in a burning sensation, particularly in the sidewalls and cuticle area. For a better result, apply a thin coat of gel. While it may be tempting to apply thick gel coats, do so carefully. You should also ensure that the nail plate is completely dry before applying the gel.
Another possible cause for gel nail burns is incorrect curing. The wrong curing procedure can lead to excessive shrinking. A tightly woven net will shrink more than a loose one, resulting in bubbles and lifting in the center of the nail plate. Improper mixing of polymers can result in serious problems. An incorrect curing temperature can lead to a bubble appearance. It is essential to know what causes the gel to burn and how to avoid it.
If your nails burn, it may be due to insufficient drying time. The process may not be complete when applied, but it is still a significant cause of nail burns. You can avoid this by choosing a thinner application of the gel. Also, consider a powder dip for a longer-lasting manicure. Dip powder manicures can last up to two weeks. This is because the gel polish cannot dry on its own. If it doesn’t dry, polymerization will begin.
Several stages are necessary for the gel to be dehydrated during gel polish application. A UV lamp is used to cure the base, colored coating, and topcoat. The application of the coat of gel may also burn the skin. While it is not uncommon for gel polish to burn the skin, excessive exposure to UV light may cause a harmful reaction. This is why the correct application is essential. It will minimize the chances of burning.
Over-filing

If you have ever had your gel nails applied by a nail technician and experienced a burning sensation, you might be wondering what caused it. This common problem is an improper application or using too much product at once. The other possible reasons for the burning sensation include using too hot a lamp or too much product at one time. To avoid the burning sensation, use a higher-quality nail salon and avoid over-filing. You can also opt to work with a home lamp, which allows you to control the heat and prevent the nails from burning.
When you file your nails, remove any skin that may rub on your gel. This will result in poor adhesion and a rough finish. Generally, you should file your nails slightly less than usual. If your nails are long and thin, avoid over-filing. Avoid rubbing the cuticle area, which can also cause the gel to lift. In either case, you should seek medical attention to prevent any infection.
Over-filing is another common cause of gel nail burning. Liquid monomer molecules are linked together during the curing process to form long chains and networks. A catalyst and initiator help trigger this chemical reaction. However, polymerization can cause a spike in temperature, which can damage the nail bed and even separate the nail plate. To avoid over-filing, you should file your nails carefully.
Another common cause of burning gel nails is over-filing. The thicker the pins, the more the gel layer will have to be trimmed. Filing your nails too much may make the problem worse. Often, over-filling causes heat spikes. It is crucial to remember that thin nails do not heat up as thick nails. Besides, narrow nail beds can also cause heat spikes.
When applying gel nails, you should use thin layers of product and cure the nails under a UV or LED lamp. Make sure to wait for 30 seconds to a minute before fixing. You should also avoid over-filing because it increases the number of heat emissions, which can cause your client to feel a burning sensation. If you do not follow these tips, you will be more likely to experience burning gel nails.
UV lamps

While you may have heard that UV lamps cause gel nails to burn, it is not valid. Although they do not burn your skin, prolonged exposure, using improper products, and exposure to too much UV radiation can lead to potential harm. Nevertheless, there are some precautions you should take to avoid exposure to UV lights. In this article, you’ll learn more about this potential danger. Regardless of your level of concern, you must protect your skin and keep the lamps and other equipment away from your skin.
First, use only UV nail lamps designed for the specific type of gel polish you’re using. Then, use the light according to the manufacturer’s instructions. It is also essential to follow the warnings provided by the manufacturer. Also, never expose yourself to more than eight minutes of UV exposure during a single gel manicure. Otherwise, you could end up with a damaged or burned hand. Follow the manufacturer’s instructions and follow all safety precautions to ensure a safe manicure.
One way to avoid a burning problem is to make sure you’re using a UV lamp that doesn’t have too high a power. UV bulbs vary in intensity, so be careful to experiment with a new brand of the UV lamp. If you don’t notice a significant effect, use a lower gel concentration to test it. However, the results will be less pronounced, and you’ll need more frequent exothermic reactions. It is best to experiment with a shorter, thinner gel nail before using a higher dose of gel.
In addition to damaging skin, UV nail lamps can also damage DNA, causing premature aging and even cancer. While getting your nails done, you’re likely to be exposed to the same type of UV rays as you would in a tanning booth. The UVA rays can penetrate the gel, causing it to shrink while sticking to your nail. This is one of the reasons why it’s essential to keep a safe distance from UVA lamps.
Excessive heat spikes

Gel nails burn due to excess heat spikes during the curing process. This happens when initiators and catalysts link small liquid monomer molecules into long chains. During this process, the nail bed is exposed to high temperatures, which can cause the nail plate to separate. Fortunately, there are many workarounds to prevent gel nails from burning. Here are three of the most common ones.
The most common problem that can cause gel nails to burn is excessive heat spikes. The amount of heat released depends on the number of polymerization bonds in the acrylic resin. If the heat spikes are too large, they can be painful. A common cause of heat spikes is a thin or damaged natural nail plate. A simple solution is to use the entire gel system. Once you understand how the system works, you can troubleshoot any common problems.
Another common cause of gel nail burning is excessive heat spikes. These result from rapid polymerization and hardening and can be dangerous if your fingers are not protected. Luckily, most cases of heat spikes are harmless, and it is usually safe to wear gloves when working with gels. However, if you do get a gel nail burn, be sure to visit a nail salon that uses safe products and reputable technicians.
There are many other causes of gel nail burning, including the improper application of the products, using too much product at once, or using a high-powered lamp that doesn’t cure the gel polish correctly. It’s easy to fix this problem by avoiding these common errors. You can choose a different salon or time of day when your favorite nail salon is less busy, but make sure that the manicurist listens to your concerns.
To prevent a gel nail from burning, you can use a nail strengthener to protect the nail bed from excessive heat spikes. Also, use a higher-quality lamp to avoid overheating your clients’ nails. A high-quality nail salon should use a light that matches the chemistry of its gel. Some brands have unique lamps, but it isn’t a good idea to mix different types of nail polish.


