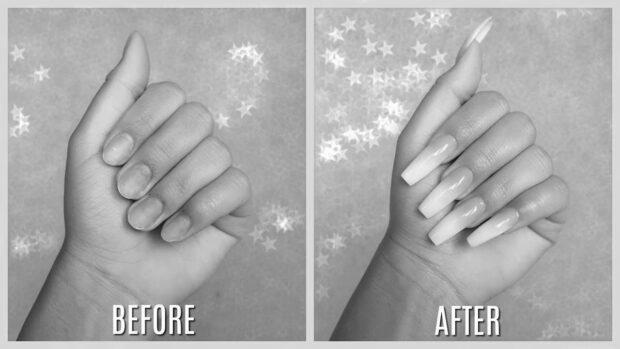
- What Are the Drawbacks of Wearing Acrylic Nails?
- Acrylic nails form a hard shell.
- They are flexible
- They can cause fungal growth.
- They are cheaper than gels.
- They need to be maintained every three weeks.
- How Do You Remove Fake Nails From Your Toes?
- Avoiding glues that contain cyanoacrylate
- Using non-acetone nail polish removers
- Using Sally Hansen Vitamin E cuticle oil
What Are the Drawbacks of Wearing Acrylic Nails?

While acrylic nails are a popular choice for women, drawbacks are also. Because of the acetone used in the removal process can lead to long-term allergies and contact dermatitis. Additionally, they can lead to thinning the nail bed, inhibiting the growth of new nails. These drawbacks make acrylic nails unsuitable for everyday use. In addition, they require extensive filing down, which can reduce nail growth. For this reason, you should wait at least two or three months between acrylic nail applications.
Acrylic nails form a hard shell.

You can make your own hard shell nails by encapsulating shell pieces in thin layers of acrylic. Shell pieces are not very flexible, so you may have to use wraps or hard gels to hold them in place. They also tend to crack when pressed. Once you have finished forming your shells, you can seal the look by applying a topcoat. To achieve this look, you will need a piece of shell paper and an acrylic layer.
Acrylic nails are typically made of a powder or liquid polymer that hardens upon exposure to air. Then the nail tech shapes it using a nail form. You can even have nail art done on acrylic if you wish. If you are worried about the cost, try a cheaper alternative. There are plenty of salons that offer nail art on acrylic nails. These are also an excellent choice for those with brittle nails.
The material used to create acrylic nails is plastic which forms a hard shell when mixed with liquid. You need to file your natural nails to bond well with the acrylic nail. Then you should fill in any gaps between the cuticle and the acrylic nail. Be careful not to use too much filler, which could weaken your natural nails. This is not an easy task. However, acrylic nails will look great once you’ve achieved this and last for many years.
A critical difference between hard gel and acrylic is that hard gel is more durable than acrylic. The hard gel can withstand more pressure and is less likely to break than acrylic. You should be careful when applying hard gel over acrylic nails because it can crack if stretched beyond the point where it can hurt. However, the hard gel will cause more minor trauma if you break it than an acrylic nail. So, it is recommended that you get your nails professionally done by a nail tech if you are worried about the damage that they may cause.
They are flexible

While acrylic nails can hide unsightly toenails, they are not flexible. A nail technician can determine the best approach for each client based on their lifestyle, and the results are usually the same.
The main downside to acrylic nails is that they can be prone to breakage, especially if left untreated. The application process is similar to gel nail polish, and Keryflex uses medical-grade cosmetic resin containing Piroctone, an antifungal ingredient. Keflex is ineffective for treating onychomycosis, but it is an excellent option for long, cracked, or black toenails.
Dip nails can be applied quickly and do not require much skill as acrylics. Dip nails tend to be more fragile than other nail extensions because their chemical makeup is weaker. However, unlike acrylic nails, the hard gel can withstand more pressure than acrylics and are less likely to break. The hard gel will crack if flexed past its stretching point but will not cause the same trauma. In addition, dip powders can cause breakage because they are more difficult to remove than acrylics.
A gel is much more affordable than acrylic nails and is often preferred by people who want a more natural-looking option. Gels are also more flexible than acrylics. Some gels are even soaked and removed. While gels have a natural look, acrylics can be thick and brittle. Gels are also easier to remove. However, you should always check the strength of your gel before applying it. You can also use strengthening products as needed to prevent acrylics from breaking.
They can cause fungal growth.

To cure your fungal infection, you must treat the fungus at the root. You must make sure that the area around the toenails is kept clean and free of moisture.
While you’re looking for an effective treatment for your fungal infection, you may want to consider essential oils. Some essential oils, such as tea trees, have antifungal properties. These essential oils are highly effective in curing fungal infections, and many are also available over-the-counter. You may want to try Listerine, which contains tea tree oil. While this is not a permanent solution, it may provide some relief from the symptoms of acrylic nail fungus.
If you’re unsure whether or not acrylic nails can cause fungus on your fingernails, you should see a dermatologist. This condition can be challenging to detect because it’s hidden under the nail. However, once you know a fungus, you’ll be able to recognize it. If you suspect a fungal infection, you should clean your nails thoroughly and apply an ointment.
As acrylic nails are applied over the natural nail, they thick, alter and lengthen. The acrylic nail polish also produces moisture, a perfect environment for fungus to thrive. Nail professionals frequently use the same tools on all their clients. Because they don’t clean their instruments, the fungus can be present on their devices. This means that anyone can be at risk for the disease.
They are cheaper than gels.

If you’re in the market for new nails, you may be wondering whether acrylic nails or gel nails are the better choices. Although both are inexpensive, there are some pros and cons to each. For example, acrylics don’t chip as easily as gels, and they can last up to five weeks. If you don’t mind getting your nails done frequently, you may want to consider acrylics. But if you’re looking for a more durable option, gel nails may be the better option for you.
Acrylic nails tend to be cheaper than gel nails. Typically, acrylic nails cost $30-$60 for a complete set, with fill-ins costing around $15-30 per month. This means that over a year, your total cost is between $195 and $390. You can also save money by avoiding nail salons that charge a lot for gels. However, the downside of acrylic nails is that they’re more challenging to remove.
Acrylics come in powder and liquid form and are kept in separate containers. After they’re mixed, they’re applied to your nails in a bead shape. On the other hand, Gel nails cure under UV light, so you don’t have to mix powders or acetone. They also have a longer lifespan. But whether they’re better or worse depends on your needs.
As mentioned, acrylic is cheaper and quicker than gel. While gels require a couple of minutes of curing under a UV light, acrylics dry while you wait for them to set. While no manicure lasts forever, the same holds true for acrylics and gels. Acrylic nails last about 10-14 days before they lift, while gels need to be renewed every two to three weeks. In addition, acrylics give off a strong odor during the application process, while gels are completely odor-free.
They need to be maintained every three weeks.

You can go for acrylic nails if you want to have gorgeous nails for an extended period. They tend to last about two to three months before being repaired or refilled. However, they can be prone to breaking and destroying the natural nail underneath. They are made from acrylic material, so they can harbor more bacteria than normal fingernails. To prevent this, you need to clean the acrylic nails regularly. Using a soft brush, you can remove any gunk from underneath and on top of the acrylic nails. After washing, make sure the pins are completely dry.
While acrylic nails can be worn for more extended periods, you should ensure they remain moisturized. Adding moisture is suitable for both your nails and your skin. Oil can also be applied to your cuticles and nails for extra protection. Additionally, you need to moisturize your hands after washing to avoid them from drying out. You may also wish to consider using a hand cream or lotion made explicitly. If you decide to go for acrylics, find a nail tech that specializes in the process.
Generally, acrylics will last for two to three weeks. If you want to keep them for longer, make sure you have them inspected by a nail technician every two to three weeks. You should check them thoroughly for fungus, infections, and inflammation to prevent nail breakage. After three weeks, you can go in for new acrylic nails. However, keep in mind that they require daily maintenance, so you must carefully plan your nail treatments.
How Do You Remove Fake Nails From Your Toes?

Fortunately, there are a few simple tricks to help you remove the acrylic on your toes. You can avoid cyanoacrylate glue and use non-acetone nail polish removers. Another simple technique is to soak off artificial toenails in a small amount of water. Finally, you can apply cuticle oil to soften and protect the toes’ natural nail follicles.
Avoiding glues that contain cyanoacrylate

If you are unsure how to remove fake nails from your toes, avoid using glues that contain cyanoacrylate. This glue has a strongly exothermic reaction and may cause a heat buildup. It should not be applied directly to cotton, tissues, or other soft materials. Because nails are vital organs, it is best to avoid contact with cyanoacrylate. However, if you cannot resist, you may try soaking your hands in petroleum jelly or acetone.
If you are unsure of which glue to use, try the specifically designed brand for artificial nails. You will need a strong adhesive that forms a good bond between the artificial nail and the skin. Super glue is a good choice for this. It can be purchased as hardware and is available in handy tubes that can be easily carried around. However, it is not advisable to use too much of it because it spreads quickly. You may also want to use acetone as a solvent if you cannot find any nail glue with cyanoacrylate.
If you are looking for glue that is easy to remove from your toes, avoid the brand Krazy Glue. It contains cyanoacrylate, which is a solid resin. This glue can be filed and buffed after it dries, but it is not recommended for use on toenails. If you decide to try this glue, use acetone to break down the dried cyanoacrylate. This will make removing your fake nails from your toes much easier.
Another way to remove fake nails from your toes is to apply non-damaging glue-like Static Nails. This product bonds with your fake nails and dissolves with wear. Unlike other adhesives, this glue will not leave any residue after removing the artificial nails. It also lets you customize the time you wear it. The time you wear it will depend on how much glue you apply. In some cases, it can be up to eighteen days, but you can easily remove it without damaging your toes.
Gorilla glue is another popular choice. This glue will stick to virtually any surface, including your toes. It can be applied to your nails by pressing them to the nail bed for ten to fifteen seconds. You should leave them on for at least an hour for them to fully cure. Make sure to wear gloves while applying gorilla glue. And remember to remove them using acetone or warm water to avoid the risk of infection.
It is vital to protect your natural nails from the harmful effects of nail polish. The first step is soaking your hands in nail polish remover. Applying the paste onto your skin before applying fake nails is very important, as the glue will not bond right away. After using it, make sure you moisturize your hands thoroughly with good hand cream. This will help you avoid the risk of tearing off the fake nails.
Using non-acetone nail polish removers

There are two main methods to remove fake nails from your toes: soaking them in acetone or non-acetone nail polish removers. Both ways will require you to wash the nails for 30 minutes. However, drinking the nails in acetone will not remove all of the fake nail coatings, and it will also take a long time.
Although acetone is considered the best method of removing fake nails, you should try the non-acetone kind. Non-acetone nail polish removers are not as harsh on your nails and will not damage them as much as acetone. However, you should be aware that these removers may damage your toes and nails.
Several non-acetone nail polish remover brands are on the market, and a growing number of nail salons are becoming more environmentally friendly. Tenoverten, for example, sells a soy-based nail polish remover in Target. Non-acetone nail polish removers also have a lot of benefits for your toes, such as no harmful side effects.
When applying acetone nail polish removers to your toes, always remember to soak them in water and avoid using an open flame. Acetone is highly flammable, so you should never use it near a flame. Make sure you clean your hands thoroughly before applying non-acetone nail polish removers. You can also apply some lotion to prevent further damage.
Another way to remove fake nails from your toes is to soak them in rubbing alcohol or non-acetone nail polish removers. After soaking them in the solution, you can scrub the fake nails off using a cuticle pusher or fake nail remover. You should be able to remove the fake nails after two to three minutes of soaking.
Another method for removing fake nails is to soak them in warm water. It works on acrylic and gel nail polish, but it can also remove nail polish from the toes. If acetone isn’t an option for you, try soaking them in a water bowl. You can do this several times, and you can even use a cuticle stick to remove the nail polish. You may find this method too painful for you, but it works well enough to remove the polish.
If you choose not to use acetone nail polish removers to remove your fake nails from your toes, you can always soak the affected areas using a cotton ball soaked in acetone. The acetone will remain on the nails for a few minutes. After that time, you can wipe off the remaining polish using the cotton ball.
Using Sally Hansen Vitamin E cuticle oil

The Sally Hansen Vitamin E cuticle and nail oil is an excellent treatment for your toenails and cuticles. It is rich in Vitamin E and works as a powerful antioxidant to protect your nails from damage. It also moisturizes the cuticles and strengthens them, preventing breakage and promoting healthy nail growth. Apply the oil over dry polish and let it sit overnight. Leaving it on for a couple of hours should be enough to help your toenails look great.
The Sally Hansen Vitamin E cuticle and nail oil are your best friend if you have dry, cracked, or flaky nails. You can apply it as often as you want, but it is best to use it in the evening before going to bed. This allows the oil to soak into your nails while you sleep. Afterward, simply remove the false nails and enjoy the softer, healthier-looking toes.
After removing your fake nails, apply Sally Hansen’s Vitamin E cuticle and nail oil to your nails. You can also use acetone. It is solid and will dissolve acrylic nails. However, it is extremely drying to the skin and nails, so it is good to protect your nails with an appropriate moisturizer before soaking in acetone.
Sally Hansen Vitamin E cuticle and nail oil come in different containers. Some come in dropper bottles and others in brush bottles. The dropper bottle will be your desktop and nightstand companion, while others will be convenient for travel. The rollerball, pen, and tin oils will be the easiest to carry around. This oil is non-stick and gets absorbed quickly.
Sally Hansen Vitamin E cuticle and nail oil can strengthen your toenails and cuticles. It can help with chipped, broken, and weak nails. It also contains hydrolyzed protein actives and vitamins A, C, and E, making it an excellent solution for soft, splitting toenails. The Sally Hansen nail strengthener is vegan and contains vitamins A, C, and E to make your toenails stronger.
Before you use Sally Hansen’s Vitamin E cuticle cream to remove fake nails from your toes, dry them thoroughly before you start. Then, take some cotton balls and apply them to the toes and cuticles. A dropper works great instead of a brush. You can also use a dropper to apply the oil.
The oil also helps to prevent dry cuticles. Besides improving the health of your nails, it also helps to protect the nail polish you’ve applied. It works best when applied in small amounts. Use it before bedtime and massage it well. Applying the oil before bedtime is also a good idea. You can apply it over acrylic nails as well.


