Easy Nail Art Ideas

Here are some easy nail art ideas to try out. These designs range in time and technique and will be a breeze to apply! Choose from these easy nail art ideas and have fun! You can even try some modern art, such as the Japanese artist Yayoi Kusama’s “Wonderland” design! You’ll need a bright yellow base nail polish and black dots of varying sizes.
Easy nail art ideas

Many easy nail art designs are both fun and easy to create. One of the most popular designs is a gradient. Use a wedge-shaped disposable makeup sponge to apply three to five different nail polish shades to make this look. Longer nails will allow for more shades of polish. Start with the base color and go to work to achieve a gradient effect! Once you’re satisfied with the look, you can repeat the process until the design is complete.
Another easy nail art idea is to apply nail foils. They are simple to apply and are easy for anyone, regardless of their skill level. Nail foils can be used to create metallic designs or splotches of color. Use the nail foil to add a pop of color or create a grungy look. Depending on the look you want, you can create as many as a dozen different designs using these materials.
Another easy nail design is the zigzag manicure. This design is perfect for summer and spring. Simply use criss-cross tape to create a geometric pattern on your nails. Apply your base color to your nails first, then stick the tape. Once your nails are dry, add sheer sparkle things to complete the look. If you want a more intricate design, use different shades of green. The possibilities are endless!
Floral prints and designs are other terrific options for summer or spring. You can do a simple lavender print to go with a light purple base, then add dots of lavender along with the fingertips. You can also use other floral designs or make your own designs. It’s fun to experiment with different colors to find a combination that suits your personality and budget. You can even incorporate some of your favorite designs into this simple design. And if you want a more unique look, consider adding a splash of red to your manicure.
Another fun nail design is the flame design. This nail design is easy to create and only requires a few tools. A yellow base is painted first. Then orange triangles are painted over it, followed by red triangles of different sizes. This design is perfect for the summer, as the triangles on your nails will look like pebbles in a pond. You need two different-sized dotting tools and a pencil or pen to create this design.
Techniques

Whether you’re short on time or in a hurry, several ways to achieve quick nail art designs are completed. One simple method involves using tape. You’ll need a base color and a pattern to begin. You can then apply nail paint to any areas not covered by the video and remove the tape afterward. Techniques for quick nail art are easy, fast, and don’t require any experience.
Nail art is the art of applying patterns and designs to nails. It can be done with taping, using brushes, or even stamping. Regardless of the method, nails look amazing after a quick painting session. For the most professional-looking nail designs, synthetic bristle brushes are best. They can produce a smooth finish and help you create any pattern or design you desire. If you don’t own a meeting, you can use a sponge to achieve the effect.
Another quick nail art design involves using a fan brush. This brush can be made from a regular paintbrush, but you can pry the base off to create a fan brush. Dip the fan brush into pink paint and use it to create stripes across your nail. Afterward, repeat the process with the other color. The combination of colors will depend on your style and the background of your pin. If you’re looking for something quick and straightforward, stripes are a great option.
Another method of adding nail designs is to use sharpies. Sharpies are an excellent choice for this because they are very accurate. However, remember to let the design dry completely before applying the topcoat. If you want to add a method without using a sharpie, wait at least half an hour before you apply it. Otherwise, you’ll risk ruining your design. Once the design is dry, apply a top coat to finish your nail design.
Another quick and easy technique is to create polka dots on your nails. Dots are a classic nail design. These designs require little to no preparation and can be done with various tools and materials found around the house. You can use a bobby pin for small dots and a makeup brush for large ones. You can also use squares of tinfoil to create a palette.
Colors

If you want to create a fantastic look in no time, you can use the tie-dye trend to your advantage. To make this trend, you will need two different colors which aren’t opposite each other on the color wheel. For example, green and red will almost certainly end up a shade of brown. Once you have chosen the colors, you will need to paint two small dots of each color onto your nail and then wipe off the excess stain using a sponge or a piece of cotton. Once you’ve finished painting your nails, you can seal your creation with a top coat to keep your look looking great.
When creating a swirl design, you’ll need to be precise and patient. Swirl designs require a striper brush or a toothpick. To create a marble effect, randomly place dots of the first color on the second and put the drops in a figure-eight or S-shaped pattern. You can use any color combination for this design, but brown and yellow look great, and green and purple look good.
If you’re feeling particularly adventurous, you can choose to use stripes in your nails. They’re easy to create and can be either horizontal or vertical, multi-colored, or one solid color. Another popular design is an animal print. If you’d like to make an animal print design, you’ll need to use three different colors, one of which is a base color. You can use black nail paint to create wiggly shapes and a second shade of color to paint over the other two. You can also do this with tiger print and zebra stripes.
Yellow is another great color for autumn. This warm, cheerful color is often associated with joy and optimism. If you’re feeling pleased, try painting a smile on your nails. Try a yellow manicure with white nail polish and a clear coat to finish the look. You’ll be amazed at how quickly it turns heads. If you’re unsure what color to choose, you can also follow these tips to create a fun look that won’t take hours to recreate.
The time it takes to apply.

It takes about 2 minutes to paint one’s nails with a single nail polish color, but if you add nail art, the time could be as much as 15 minutes. A single coat of nail polish usually takes around seven minutes to dry. A medium-length nail usually takes 45 minutes to complete. A transparent overlay may take about 45 minutes, but a 3D design may take two hours. Acrylic nails take longer to apply, so it’s better to get a shorter service.
What is the Best Style For Really Long Nails?

You should avoid nail shapes with pointed tips if you have really long nails. While they are beautiful, these shapes are not practical for working. Using a computer keyboard while wearing pointy nails is very annoying and slows your typing speed. Instead, opt for long rounded nails for productivity. The following article will explain the benefits of long round nails. Feature nails and Modern French are a few popular choices.
Feature nails

Try a fun fruit-themed design if you want to add a pop of color to your nails. Fruit designs are a great way to incorporate a bright color and can be in any combination of colors. To add a pop of contrast, place the design on the tip of your nails. By focusing on the ends of your nails, you’ll highlight the shape of your nails. This design works well on any nail length but is best for nails of almond or oval-shaped nails.
If you’re worried about breaking your long nails, you can choose a longer nail shape. Long nails can be prone to breakage and may make it difficult to carry out day-to-day tasks. That’s why the most durable styles are rounded versions. Also, they don’t break easily and don’t require too much maintenance. But remember to clean your long nails regularly. A quick manicure every day will keep them looking great.
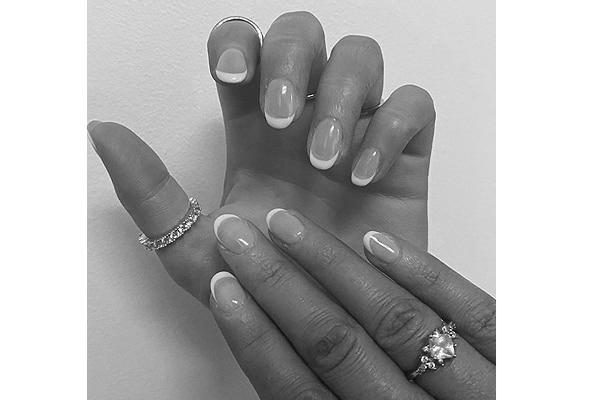
Modern French manis

You can wear a French manicure for weeks if you have really long nails. The modern French mani involves:
- A shorter length of the pin.
- A strip of white on top.
- The trademark level of gloss.
One celebrity who has perfected this look is Olivia C. Tonin, who owns a nail installation business and posts pictures of her manicure on Instagram. She began experimenting with the French manicure as a teenager and has been wearing increasingly intricate designs in recent years.
You can try any French manicure type, whether you want a bold, statement color or a more subtle design. If you are going for a modern twist on the classic French manicure, you can try using guide strips to ensure a smooth finish. The second color must be completely dry during the second coat, but not so much that it leaves an indentation. You should also give the nails an excellent two-minute dry time to avoid indentations. Finish with a top coat to seal it all.
While the classic French manicure has been a staple of beauty salons for decades, it has become a rage amongst fashionistas. Today, you can find dozens of modern French manicure designs with the same timeless DNA. New York City nail artist Miss Pop predicted what would be hot in December, and these trends seem to be coming true. Aside from classic French manicure designs, some nail artists have also developed some wacky spins on them.
Line art

The monochromatic look works well with various settings, including a black and white outfit. In fact, this style is more versatile than any other, as it can be worn with a wide variety of clothing colors and patterns. Monochromatic nails are not challenging to create and tend to draw attention to the fingers and not the entire nail. Monochrome designs are particularly effective when paired with lengthy, pointy claws, which lend themselves to this style.
A thin line is perfect for drawing wrinkles on hard or soft clothing. Thin lines are better for drawing inside the pupils. A thicker line is best for a three-dimensional look and is the best style for really long nails. However, the best technique for really long nails is a combination of thin and thick lines. Here are a few things to remember when you’re drawing long nails. – A thin line is best for drawing wrinkles and lines inside the eyes.
– A longer nail needs more detail than a shorter one. It’s better to add details to a long pin since it can add a sense of luxury. You can use colored rhinestones or a simple design if you have really long nails. If your nails are extremely long, you can make them look like an extension of your hand. Adding a few accents can add sparkle to your manicure.
Fruit

If you have long nails, consider adding fruit nail art to them. Summer is a time of bright sunlight, juicy fruits, and a great mood. This style will give you the same feelings. Tiny bits of fruit will add color to your day and make you feel good. Check out the pictures below to get some inspiration. You can create your own fruit manicure by choosing a fruit you like.
One of the most popular and eye-catching nail styles for long nails is fruit nail art. Using a bright, bold color on your nails is sure to get attention. This style is also easy to achieve. You can use one fruit or several different fruits. Use a bright orange to draw attention to your fruity nail design. You can also make it look sophisticated by choosing a bright color for the base.
For the perfect summer manicure, you can add a fruit-inspired design. This summer, many of the most popular fruit designs are made of vivid and vibrant colors. You can create a fruit design on the entire nail or paint a part of it. You can also mix and match fruits with other creative ideas to get the right look. Depending on how long your nails are, you can even choose to apply a different fruit design to each finger or toe.
Coffin

A coffin nail style can be challenging if you don’t have really long nails. However, if you have a square nail, it’s not impossible to reshape it into a coffin shape. You can create this look on both natural and acrylic nails. Acrylics provide more strength and durability than natural nails, but the coffin shape gives you more flexibility in nail design.
Another way to make a coffin shape look elegant without adding a significant length to your nails is to apply black nail polish. The coffin shape will only need a small size for your natural nail. Once the sides of your nails have been tapered, you can square off the ends. You can apply a thin strip of black polish along the edges for extra elegance. You can also add rhinestones to make your nails look like diamonds.
Another coffin nail style for really long nails is called the French tip. This style allows you to play with the spacing of your pins and will look particularly striking on a nude base coat. Another option for coffin nails is the French tip, which features a light and subtle shades. If you want to recreate the look yourself, this nail style is relatively easy to achieve at home. You can choose a color from various neons and other colors.
Square-meets-oval hybrid

If you have really long nails, you may want to try the square-meets-oval hybrid shape. The square-meets-oval body has the same general form as an almond, but the tips are more extended and sharper. Squoval nails follow the lines of square nails, but the sides are rounded to create a softer outline. This shape is best for subtle designs and isn’t as flashy as other shapes.
An oval shape is also a popular nail shape. Oval nails are rounded, which can lead to breakage at the tip. Oval nails are often flattering on medium-length nails, but longer ones can look unflattering if the ends are too pointed. An oval nail style isn’t recommended for shorter nails, but you can use it to create an eye-catching nail design.
A square-meets-oval hybrid is an easy and practical shape for long nails. This shape is also a sensible choice, making it easy to care for. It’s also widespread and easy to maintain. The squoval is the most popular style among women. It’s flattering, but it can also create a chic look.
Squoval nails are relatively easy to achieve. Simply file down the nail tip while gently rounding off the corners. If you’re looking for a dramatic shape for really long nails, the square-meets-oval hybrid shape is for you.


