- How to Remove Fake Nails Stuck on With Glue
- How to remove fake nails stuck on with glue.
- Avoid touching wet glue with your bare hands.
- Acetone
- How to Make Thin Acrylic Nails
- Applying acrylic to thin acrylic nails
- Choosing the appropriate thickness for nail enhancements
- Choosing a brush for applying acrylic to thin acrylic nails
- Removing acrylic powder
How to Remove Fake Nails Stuck on With Glue

If you’ve ever had to remove fake nails stuck on with glue, you know how frustrating it can be. Here’s what you can do. First, avoid touching the wet cement with your bare hands. If you’ve accidentally touched the glue with your hands, soak them in warm water. The water will soften the glue, making it easier to remove the nails. Next, use Acetone or a nail remover to carefully cut off the fake nails.
How to remove fake nails stuck on with glue.

If you’ve accidentally spilled nail glue on yourself, you can easily remove it by rinsing your hands with water and table salt. If the glue has dried, you can use nail polish remover or Acetone. After soaking your hand:
- Rub it with a soft brush to remove any dried glue.
- Repeat this process if necessary.
- If these steps don’t work, try soap and water.
First, use a nail buffer to gently buff the fake nail away. Be careful when filing the fake nail off because you may damage the natural nail. Next, use tweezers to pry off the edges of the artificial nail. Avoid forceful removal because this could cause permanent damage to your natural nails. Lastly, you should wipe your hands dry to avoid damaging your nails. Then, you should apply some cuticle oil to your hands to prevent the fake nails from sticking to your skin.
If you cannot break loose glued-on, you can use a soft object to pry them apart. This will loosen the glue and help you remove the press-on more easily. You can also use Goo Gone to get rid of stubborn glue and nail polish. You can repeat this process if you’re still unable to remove the fake nails. And if it doesn’t work, try a different method.
If you can’t wait for the nail to dry, you can use vinegar. But you should wait a few days before applying the vinegar or Acetone to remove the press-on nails. You should repeat this process until the glue disintegrates completely. Afterward, use a toothbrush to clean off any leftover adhesive. This method can work for some people. But if you’re not confident enough to remove them using these methods, you should seek professional help.
Although removing nail glue from the skin is quite tricky, it’s easier than you might think. First, soak the clothing in cold soapy water. Then, take a toothbrush and gently scrub the glue off. Repeat this process several times until you’re confident you’ve removed all bond traces. You can also use nail polish remover, which contains Acetone, to loosen any remaining adhesive.
Avoid using nail glue if possible. The glue contained in it may cause skin irritation. If it gets on your eyes or lips, seek medical attention, which could lead to chemical burns. If you accidentally applied too much glue, don’t rub it off with your fingertips. Apply artificial nails carefully and methodically. This way, you’ll minimize the chances of damaging your natural nails. Here’s how if you’re not sure how to remove fake nails stuck on with glue.
Avoid touching wet glue with your bare hands.

If you’ve applied the nail glue to your nails and now you can’t get them off, don’t despair. You can easily remove fake nails stuck on with glue by following the steps below. These steps will help you avoid irritating your skin and get rid of your artificial nails in no time. Before beginning, make sure you understand the glue’s purpose. Some people stick fake nails on their hands in a dangerous way to their hands.
If you’ve applied excess glue to your fingernails, do not try to remove the nail polish using your bare hands. While this may seem like an easy solution, it can cause more problems than it solves. Before removing fake nails stuck on glue, wash your hands with hot soapy water. Apply petroleum jelly on your finger to retain moisture while removing the glue.
To avoid damaging your nails:
- Use safe glue that contains cyanoacrylate.
- Avoid using craft glues or nail glues without cyanoacrylate.
- Avoid using polyurethane-based adhesives as these are messy and can stain your skin.
- Avoid using these products for artificial nail bonding and construction projects.
This is especially important when removing fake nails that have been stuck on with glue.
Another popular method for removing fake nails stuck on with glue is to soak a cotton ball in water and rub it against the pins. The cotton will loosen the glue’s bond. However, you should avoid touching wet cement with your bare hands. When applying this method, you must be aware that lemon juice has citric acid, which can easily remove stubborn stains and superglue bonds.
The glue should be removed with warm water. If you want to use Acetone, make sure you do so gently, as it can burn or sting your hands. You should also rinse your hands thoroughly. If you still cannot remove the fake nails, you can soak them in warm soapy water for about 15 minutes. Then, rinse your hands thoroughly and apply petroleum jelly to minimize drying.
Using an acetone-based nail polish remover can help remove nail glue. Simply soak a cotton swab in the nail glue until it dissolves. If you can’t find a nail glue remover without Acetone, you can use petroleum jelly. Alternatively, you can use a nail polish remover and a toothbrush soaked with acetone solution.
Acetone

If you have fake nails stuck on with glue, Acetone will dissolve them. However, Acetone can cause dryness or irritation of the skin, making them look worse. If you have already tried Acetone, you should remove them carefully with a fine-grit file, cuticle oil, or polish remover. This will take 45 minutes. After that, rinse your hands thoroughly.
If Acetone isn’t your thing, don’t worry – it’s safe to use. Using cotton swabs to apply the Acetone to the glue-covered area will help you pinpoint the exact location. You can even use a clean toothbrush to remove any remaining glue residue. If Acetone isn’t your thing, you can try petroleum jelly. It can easily dissolve the glue on your hands.
After applying Acetone to the fake nails, you should wash your hands thoroughly. Pay particular attention to areas around your cuticles. You may also want to use a nail buffer to help with this process. Then, you can use cuticle oil to soften the skin around the fake nails. Be patient, as the fake nails are in a delicate state. Once you’ve removed the glue, apply cuticle oil to your hands.
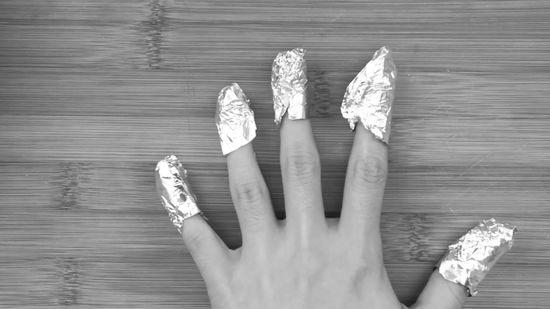
You can also use Acetone to remove fake nails stuck on with glue. First, place the pins in a large Ziploc baggie, allowing them to soak for about 20 minutes. Then, use a wooden cuticle stick to scrape them off. If the nail doesn’t come off quickly, re-soak them with Acetone for 5 minutes. It will take longer if the pins haven’t been removed thoroughly. After that, you can use a cuticle pusher to scrape away the extra acrylic.
Another method that may work for you is to soak your fake nails in warm soapy water for 15 minutes. This will soften the glue on the artificial nails. This will allow you to remove them gently without damaging your natural nails.
Another way to remove acrylic nails is to soak them in hot water. It can remove acrylic nails quickly, but you need to take care of your nails after washing them in Acetone. It’s best to not let the Acetone contact your skin for too long. You may notice redness and irritation, but it’s nothing to worry about. This method is safe and will save you time and money in the long run.
How to Make Thin Acrylic Nails

If you want to apply thin acrylic nails, you can follow a few tips to create a beautiful and smooth finish. First, determine what thickness you want your nails to be. Next, choose the brush you will use. You will also need to remove the excess acrylic powder. After applying thin acrylic nails, you will need to carefully clean your hands to prevent infection. If you don’t want your acrylic nails to chip or peel, use a brush made especially for applying acrylic.
Applying acrylic to thin acrylic nails

Whether you are a beginner or an experienced artist, you should know a few things about applying acrylic to thin acrylic nails. These products should be of high quality, and you should do your research before purchasing them. You do not need to spend a lot of money, but you should also make sure you’re getting the best value for your money. Cheaper products may not be worth the quality. Applying acrylic to thin acrylic nails is not difficult, but it can take a lot of time and practice.
Before applying acrylic to thin acrylic nails, you must first prep your nails:
The goal is to create a smooth surface that matches the acrylic. The process can be tricky if you don’t know how to shape your nails properly.
After applying acrylic, you should clean your hands thoroughly. Apply the acrylic thinly to the cuticle and then use a cuticle pusher to scrape off the remaining layers. You can also use an acetone-soaked cotton pad to soak stubborn areas that won’t come off. If you have a gel polish over your acrylics, you should break it before washing. Otherwise, you might damage the gel.
Lastly, you should apply a base coat. The gel base coat will make your acrylic nails thicker and prevent them from cracking. After the topcoat is used, you’ll have beautiful new acrylic nails. Once they’re dry, you can apply a second layer of acrylic to thicken them further. You’ll be amazed by the difference a gel base coat makes. The gel will make your acrylic nails look even more beautiful than they already are!
Before applying an acrylic nail, make sure your natural nails are healthy. The first step to using acrylic is to prepare the nail surface with an acid-free primer. Next, pour monomer into a dapper dish. Dip your brush into the powder or liquid. Next, apply a small bead of the product to the nail. Move your brush up the pin toward the tip. Finally, use your brush to smooth out the acrylic product.
Choosing the appropriate thickness for nail enhancements

Choosing the proper thickness for acrylic nail enhancements is a vitally important step. It’s essential to select the correct thickness because too thick of an enhancement can weaken the natural nail. The wider the enhancement, the more it will be stressed by gravity and weight. The thicker it is, the more likely it will break, which will cause unnecessary stress on the natural nail.
Using the correct forms is essential when choosing the right thickness for your enhancements. When selecting the appropriate nail forms, look for a state with a strong adhesive and a high paper-to-foil ratio. A plastic form will break during application and can stain the enhancement. A clear plastic form can prevent staining of a hard gel enhancement. During your appointment, ask your technician about the proper thickness.
A nail enhancement chart helps nail technicians determine which enhancements will best suit the client’s needs. While acrylic nails are durable and require minimal upkeep, repeated applications can damage natural nails over time. While acrylic nails require little maintenance, they have a dusty odor that must be avoided. And while acrylic nails look fantastic when new, they can be damaging if applied too often. If you’re planning to have your acrylic nails used repeatedly, you should choose a thickness that suits the individual’s lifestyle, occasions, and proper upkeep.
While acrylic nails can feel heavy, they should never hurt when applied correctly. If you have never worn acrylic nails before, it’s best to opt for a thinner, natural-looking version. The best acrylic nail enhancements can last for a few years if they’re taken care of properly. If you have a natural-looking nail, make sure you have it filed before getting it enhanced. A poor-quality acrylic nail tip will leave a messy mess behind.
Choosing a brush for applying acrylic to thin acrylic nails

Choosing a brush for applying acrylic to thick acrylic nails is a bit trickier than choosing a thin pin. If you are just learning the ins and outs of acrylic nail art, you should choose a smaller brush. An experienced nail tech knows what size brush to use, but you may be lost if you are new to the field. To make your job easier, choose a meeting made of 100% kolinsky sable hair.
The ideal size for acrylic nail brushes is between a size 8 and a size 10. You can use a size eight brush for thin acrylic nails, but it is not recommended. Size 8 acrylic nail brushes can handle only three beads per nail, while a size 10 brush can do four or five. A thicker brush is recommended for thick acrylic nails because it can apply a thicker layer faster.
Typically, acrylic nails require a thinner brush to ensure a smooth finish. A thicker brush will leave a ridge on the acrylic, which will look less professional and may cause the nails to crack and chip. However, a thin brush can make thick acrylic nails look better. In addition, you can get better detail with a more delicate brush. So, it’s worth spending a little extra money to choose a thicker brush for thinner acrylic nails.
An acrylic nail brush will need more small beads, but it will cost more. A flat brush is best for cuticles because it doesn’t hold as much acrylic as around one. Flat acrylic nail brushes will also allow you to maneuver more efficiently in narrow spaces. A square acrylic nail brush will struggle to hold liquid monomer, and the beads tend to be thick. A round brush will contain enough monomer and have an excellent liquid-to-powder ratio.
Another thing to consider is the size of the brush. While many larger brushes are great for thick acrylic nails, smaller ones are better for beginners. Larger meetings will allow you to cover a larger nail area with fewer strokes. These will also allow you to apply more acrylic and reduce drying time. Choosing a brush for applying thin acrylic nails will depend on your technique and the size of your nails.
Removing acrylic powder

There are a few different ways to remove acrylic powder from thin acrylic nails. Firstly, you can try e-filing the acrylic powder off to the base of your natural nail. Or, you can soak the powder in warm Acetone. Heat the bottle under running water, and it will flow through the hardened acrylic powder easily. Do not microwave or place it near a direct heat source. You should then trim the acrylic nails short.
Next, you can use Acetone to remove the acrylic. Simply dip your finger in the Acetone and wait between twenty to thirty minutes. The Acetone will break down the acrylic faster if it is warmed. Use a coarser nail file to gently scrape off the acrylic. Be careful when filing back and forth, as the nail file may become clogged with acrylic powder. If you cannot remove the entire acrylic powder in one session, you should seek professional help to get the job done correctly.
After removing the acrylic powder, you should apply a coat of nail polish to the nail. This will keep the nail powder from clogging the pores of your natural nail and prevent them from sticking to the acrylic. After this, your nails will be clean and ready for your next acrylic and gel application. Depending on how often you use the acrylic powder, the manicure will last two to three weeks. The longer you use it, the longer it will last.
Using acetone-soaked wipes will help remove any excess powder. You can also apply acetone-soaked wipes on your nails to remove any nail dust. The acetone-soaked wipes will remove any remaining dust. If this is not enough, you can use nail polish remover. It will take less than half an hour to obliterate the acrylic powder. You can apply it in three stages. Apply the first one halfway down your nail. Then, move on to the second part.
When removing acrylic nails, it is essential to take extra care not to over-buff the pin. Doing so can weaken the acrylic nail and damage the natural nail. Therefore, you should always use high-quality nail powder to ensure the nail remains as healthy as before. If you want a thinner acrylic nail, you can also use an over-the-counter remover, but follow the directions carefully.


